|
Setting up the Project
To start, open up TGB (by clicking the TGB icon on your desktop). By default, the Level Builder will start with the last project that was loaded. This makes it really easy to pick up where you left off. If you have been playing around with the Level Builder before reading this you will see whatever you worked on last.
 Figure 1.1 |
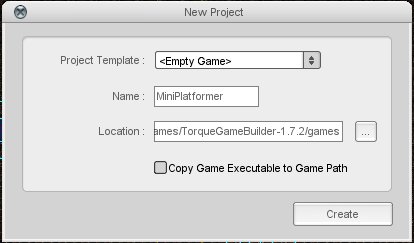 Figure 1.2 |
To create a new project, select New Project… from the File menu. When you do this, the New Project dialog will appear. For the purposes of this tutorial we will call this project MiniPlatformer (Figure 1.2). This will bring up the level builder (Figure 1.3).
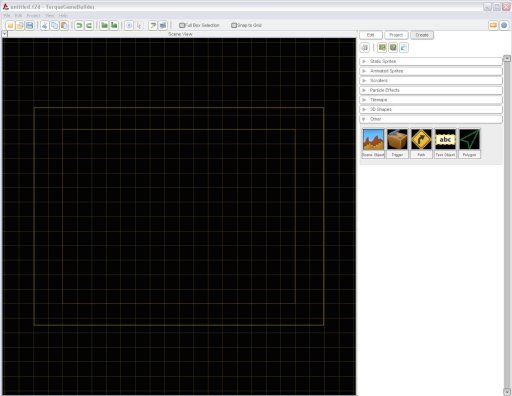 Figure 1.3
Importing Art
It's time to start adding the content we will use in our platformer. Because we are trying to keep things simple we will only add two image files to the project. Copy the following two images to your ./games/MiniPlatformer/data/images folder</i> (Figure 1.4) (Figure 1.5).
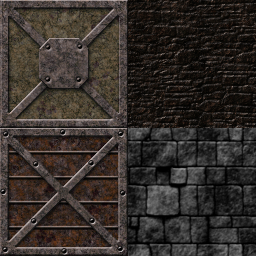 Figure 1.4 Image:Player.png
With that done we are now ready to import those images into the LevelBuilder. Click the Create a new ImageMap icon on the right sidebar (Figure 1.6). You will be prompted to pick between the two images we added to our images folder. Select the MiniTileMap.png file from the list. TGB will automatically import the image for you with the image mode of FULL. In some cases like this one, we need CELL image mode so each of the 4 different tiles can be selected individually. In the Static Sprite rollout, double click on the newly added thumbnail of the MiniTileMapImageMap (Figure 1.7).
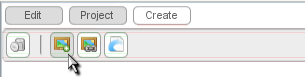 Figure 1.6 |
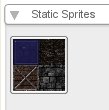 Figure 1.7 |
On the Image Builder dialog change the Image Mode to CELL. You'll notice how this nicely separates the tiles into four separate chunks. This will be important later when we go to build our tile map.
Repeat the process for Player.png, adding it as a new image map and then picking CELL for the Image Mode. You'll notice that things don't look exactly right this time. It appears that there are four player images per cell. To fix that we need to edit the "Cell Width" and "Cell Height" properties so they both read "128" (Figure 1.8).
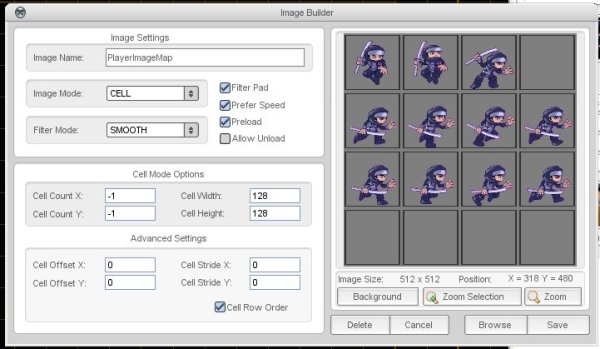 Figure 1.8
Creating Animation
In this section we will create four animations for our player from the PlayerImageMap. They are...
- playerRunAnimation
- playerJumpUpAnimation
- playerJumpDownAnimation
- playerStandAnimation
Some of these animations will only have one frame, but you will see how we could easily add more. Lets start with the Run animation since it's the most interesting. Start by clicking the Create a new Animation icon (Figure 1.9). On the Select Source dialog that appears choose "PlayerImageMap" and click "Use Selected ImageMap" (Figure 1.10). After that you will be presented with the animation builder dialog. Here you can drag frames from the imageMap onto animation time line.
 Figure 1.9 |
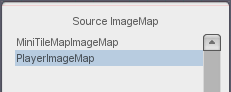 Figure 1.10 |
Drag frames 4 to 11 from the imageMap onto the animation timeline, one after the other. When you have finished you should have something that looks like (Figure 1.11). You can slow down the preview the animation to 15 frames per second and see if the animation is moving smoothly and then save the animation as PlayerRunAnimation.
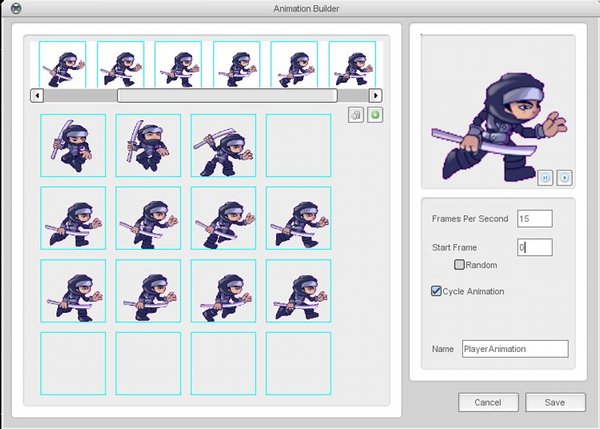 Figure 1.11
The remaining animations are built in the same way except that they only have one frame of animation (in your own project you could add more). The list below shows what animations to create and what frames to assign them.
- playerJumpDownAnimation - Frame 0
- playerJumpUpAnimation - Frame 1
- playerStandAnimation - Frame 2
Create the remaining three single frame animations. When you are done your Animated Sprites rollout should look something like (Figure 1.12).
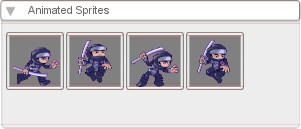 Figure 1.12
Building a Level
Now we will build a simple tileLayer for our level. Drag and drop the newLayer.lyr object from the Tilemaps rollout onto your scene (Figure 1.13). Once you've placed it on the scene you'll have to customize it a little to make it work with the rest of our art.
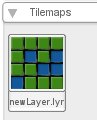 Figure 1.13
The tilemap editor will automatically be brought up. In this mode you can not only "paint" tiles down, but also edit the tile layer properties. The Tile Count and Tile Size fields can be edited as you wish (Figure 1.14). It is probably a good idea to increase the amount of tiles from the default 10x10, so it can cover the camera view and even go beyond it. A tile count of 40x20 should give you more than enough room to play with in creating a basic platforming level.
Note that just changing the tile count (or size) will not necessarily change how many cells are visible. You also need to resize the tile map in the level editor itself. To do this, you have to get out of "Edit Tile Layer" mode by clicking the Selection Tool in the toolbar at the top of the window. You should see the tile layer rectangle with eight drag handles. Use those to resize the tile layer until it's as big as you want.
Also note that to edit an area bigger than your screen, you can either zoom out (using the scroll wheel on your mouse), or pan by right-clicking and dragging in the editor.
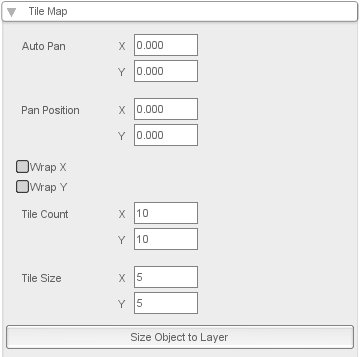 Figure 1.14 |
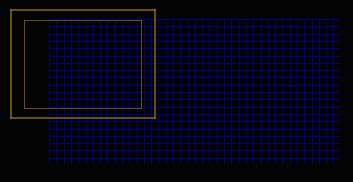 Figure 1.15 - Orange box is the camera view, blue grid is the tile layer |
Now, it is time to start filling in the grid with tiles. In the Tile Editing rollout (Figure 1.16), click on the image drop down menu and select MiniTileMapImageMap. Notice how a small "Frames" button appears below the image drop down showing 0 (Figure 1.17). This means that MiniTileMapImageMap contains multiple tiles. By default the first tile in the ImageMap is displayed on the right sidebar.
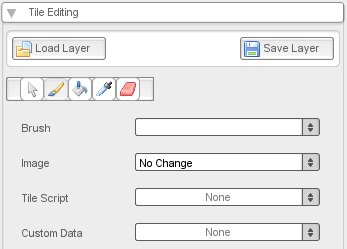 Figure 1.16 |
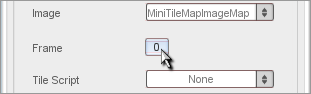 Figure 1.17 |
Click the "Frames" button and select a good background tile (Figure 1.18). This tile will be behind our player as he runs around the level. We will fill the tilemap with these background tiles and then paint our platform tiles over-top. Now use the "Flood fill" tool to fill the tile map (Figure 1.19) with background tiles.
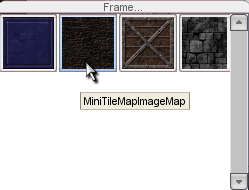 Figure 1.18 |
 Figure 1.19 |
With the background finished, now select the "Paint" option in order to place individual tiles down and select an appropriate platform tile - like frame 0. Create a floor and some platforms to jump on. When you are done, save the tile layer as layer1.lyr and press enter or click on the selection tool icon in the toolbar to leave the tile editor mode. An example of a typical level is shown below (Figure 1.20).
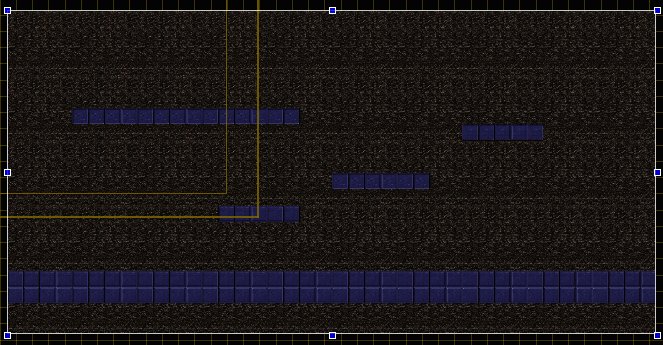 Figure 1.20
If you wish, you can move the position of the tile layer to X: 30, Y: 0.
The following step is ENTIRELY OPTIONAL; it is purely a cosmetic change. Feel free to skip to the next section.
There are times when you may not want a tiled background for your level, but instead a static picture. TGB gives you a lot of different ways to control how you build and display your levels. If you are unhappy with the repetitive patterns in the background tiles you could erase them and replace the background with a static image behind our tile layer.
To do this, erase the background tiles we placed before using the "Eraser" tool, and leave those tiles transparent, as in (Figure 1.21).
 Figure 1.21
Import the following image into the project by clicking the "Create" button on the right sidebar. Add the image (Figure 1.22) the same way we did with the player and the tile images.
 Figure 1.22
Now drag and drop the background image onto the level, at first the image will appear on top of our tile layer. To send it to the background, click the "Edit" button in the right sidebar, then locate the "Scene Object" rollout and change the image's render Layer to 30 (the render layer is visible in (Figure 1.23)). You may have to resize the image a bit to get it exactly behind the tilemap and looking good.
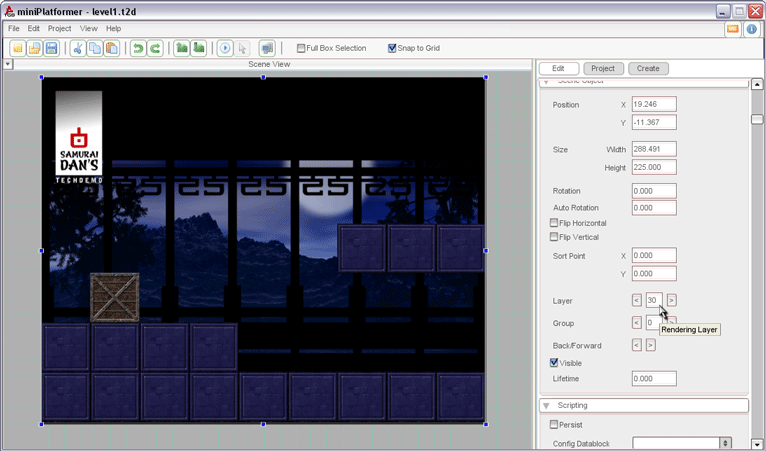 Figure 1.23
Adding Collision Properties
If we were to put in a player object at this point, chances are he or she would fall through the floor! The tile layer we set up holds only the visual information for our platformer. Let's add some solid ground to stand on. On the create tab, scroll down to the "Other" section and drag a Scene Object into the level (Figure 1.24).
 Figure 1.24
The size of the scene object should match the size of the entire length of floor tiles you painted down. Change the group of the scene object to 1. Give the scene object the following collision properties (Figure 1.25).
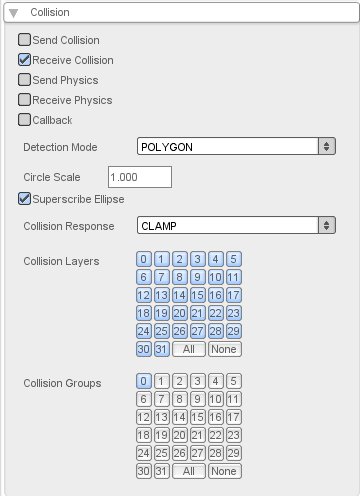 Figure 1.25
Depending on how you placed your platforms and floor, your level should now look similar to this:
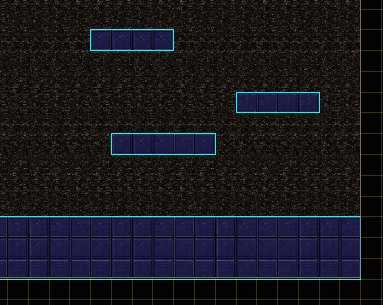 Figure 1.26
Continue on to the next section when ready: Creating a Player
Return to Platformer Mechanics Tutorial Hub
|


