


TGB/Tutorials/Cellular Automata Laboratory
From TDN
 |
[edit] Cellular Automata Laboratory Tutorial
Written for TGB/iTGB. Comments, questions?: Please use this forum Source files : Download source files and executable from here |
Getting started
In this tutorial we will extend the Game of Life Tutorial with the definition of new cellular automata classes. To see the Game of Life Tutorial please visitGame of Life.
We will be defining a Torque class named CaLab for the Torque script.
Copy the level file used in the Game of Life or create a new project from
scratch and edit the level file and add a parameter with the name of our new
class to the t2dSceneGraph instantiation as in
%levelContent = new t2dSceneGraph(CaLab)
Then change the camera size parameters to
cameraSize = "64 96";
This class works both for TGB or iTGB, so these camera settings allow to simulate an iPhone portrait aspect ratio while running in Windows.
Adding a panel
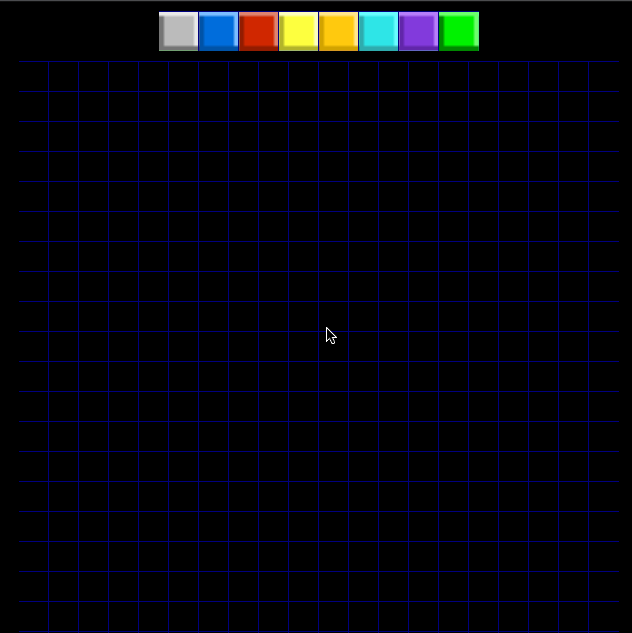
Our Cellular Automata Laboratory consists of a panel, where a state of the cellular automata can be chosen by mouse click (TGB) or touch (iTGB). Here's the definition of our panel
function CaLabPart1::CreatePanelTileLayer(%this)
{
    %this.PanelTileLayer = new t2dTileLayer()
    {
       class = "TileLayerPanel";
    };
    %this.PanelTileLayer.setUseMouseEvents( true );
    %tileCountX = 8;
    %tileCountY = 1;
    %tileSizeX = 4;
    %tileSizeY = 4;
    %this.PanelTileLayer.createLayer( %tileCountX, %tileCountY, %tileSizeX, %tileSizeY );
    %this.PanelTileLayer.setSize( %tileCountX *%tileSizeX, %tileCountY  * %tileSizeY );
    %this.PanelTileLayer.setGridActive( 1 );
    %this.PanelTileLayer.setPosition( 0, -45 );
    %this.getGlobalTileMap().addTileLayer( %this.PanelTileLayer  );
    for  ( %x = 0;  %x <  %this.PanelTileLayer.getTileCountX(); %x++)
    {
       %this.PanelTileLayer.setStaticTile( %x, 0, CaImageMap, %x );
    }
}
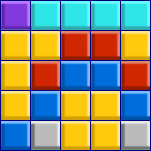
If you remember from the Game of Life Tutorial, our basic image consists of 8 square frames.
![]()
The code above just draws them at the center top of the screen. Here it is what we get
This is the Torque script way of subclassing. In this case we subclassed the class because we want it to respond to mouse events. Here's the custom mouse down event for the class
function TileLayerPanel::onMouseDown( %this, %mod, %worldPos, %mouseClicks )
{
   CaLab.pickPanelTile( %worldPos );
}
It calls a function of the main class. Here is the function:
function CaLabPart1::pickPanelTile( %this, %worldPos )
{
   %this.selected_state = getWord(  %this.PanelTileLayer.pickTile( %worldPos ), 0 );
}
We use the pickTile function oft2dTileLayer to initialize a variable that tells us what is the current state of the Cellular Automata.
The CA Grid
We need a grid to draw our Cellular Automata. Here it is
function CaLabPart1::CreateModelTileLayer(%this)
{
    %tileCountX = %this.model.get_size_x();
    %tileCountY = %this.model.get_size_y();
    %tileSizeX = 3;
    %tileSizeY = 3;
    %this.WallTileLayer = new t2dTileLayer()
    {
       class = "TileLayerModel";
    };
    %this.WallTileLayer.setUseMouseEvents( true );
    %this.WallTileLayer.createLayer( %tileCountX, %tileCountY, %tileSizeX, %tileSizeY );
    %this.WallTileLayer.setSize( %tileCountX * %tileSizeX, %tileCountY * %tileSizeY  );
    %this.WallTileLayer.setGridActive( 1 );
    %this.WallTileLayer.setPosition( 0, 0 );
    %this.WallSizeX = %this.WallTileLayer.getTileCountX();
    %this.WallSizeY = %this.WallTileLayer.getTileCountY();
    %this.getGlobalTileMap().addTileLayer( %this.WallTileLayer );
}
Very similar to the panel tile layer, since we also want the grid to respond to mouse events. This time we will use dragging the mouse to draw tiles on the grid, and assign the frame index directly to the C++ model.
function CaLab::pickModelTile( %this, %worldPos )
{
   %tile = %this.WallTileLayer.pickTile( %worldPos );
   %x = getWord( %tile, 0 );
   %y = getWord( %tile, 1 );
   %this.model.set_value( %x, %y, %this.selected_state );
   %this.DrawGrid();
}
For the custom tile layer to respond to mouse drag events, we defined.
function TileLayerModel::onMouseDragged( %this, %mod, %worldPos, %mouseClicks )
{
   CaLab.pickModelTile( %worldPos );
}
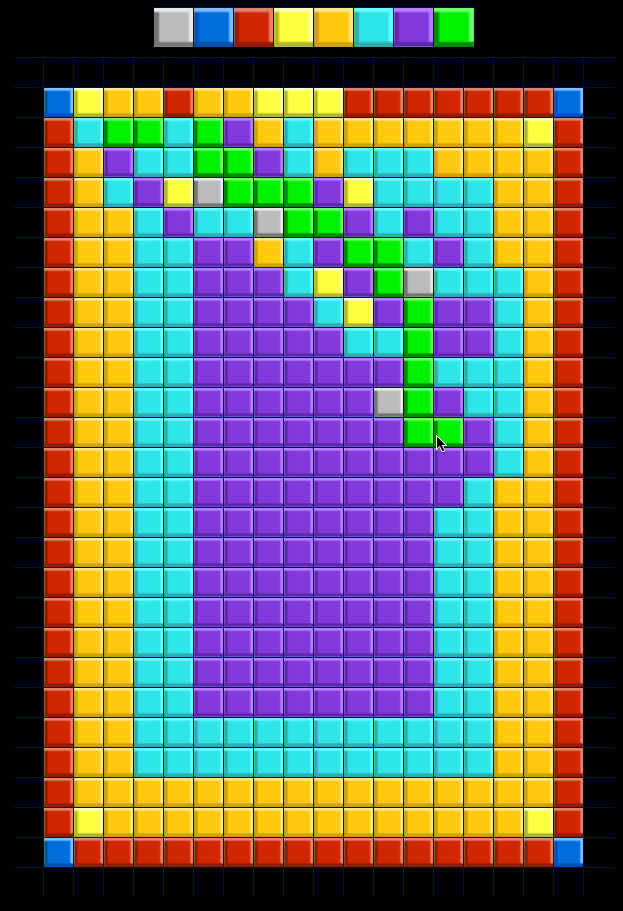
Here is an example where we selected the last frame on the panel and defined some grid positions by dragging the mouse

The C++ model
This time we defined a new class that attempts to simulate (probably in a not very scientific way) heat diffusion. We extended our basic Cellular Automata class for this. Here's the class declaration
class CaHeatSpread : public CaModel
{
   typedef ScriptObject Parent;

public:
   CaHeatSpread();
   bool onAdd();
   void onRemove();
   void initialize( S32 sx, S32 sy );

   DECLARE_CONOBJECT(CaHeatSpread);

protected:
    virtual int rule( int i, int j );
};
We have the virtual method rule, this time implemented as
int CaHeatSpread::rule( int i, int j )
{
  int cell, next; VonNeumann_neighbourhood( i, j );
  if (state  < max_state )
  //if not last state
  { next = (  N  + S + E + W ) / 4 + 1;
  if ( next <   max_state ) cell = next;
  else if ( next == max_state ) cell = 0; //last turns first
  }
  else if ( state == max_state )
  {
   cell = max_state; //last stays last
  }
  return cell;
}
Putting it all together
Finnaly we need a constructor in script that instantiates our C++ model
function CaLab::OnAdd(%this)
{
   if( $platform $= "windows" )
   setScreenMode( 640, 960, 32, false );
   %this.model = new CaHeatSpread();
   %this.model.initialize( 20, 28 );
   %this.CreateModelTileLayer();
   %this.CreatePanelTileLayer();
   %this.DrawGrid();
   %this.selected_state = 0;
   new ActionMap( CaActionMap );
   CaActionMap.bindCmd( keyboard, "right", "CaLabPart1.PlayerMovement( right );", "" );
   CaActionMap.bindCmd( keyboard, "left", "CaLabPart1.PlayerMovement( left );", "" );
   CaActionMap.push();
}
Here is the result of our Cellular Automata running.
Credits: This work was inspired from
John Walker and Rudy Rucker's Cellular Automata
