


WorldBuilding/Terrain/Realistic Blended Terrain Using Terragen
From TDN
Using Terragen to Create Better Blended Terrains
Note from the author: this tutorial was created before the release of L3DT Professional, which now has Atlas-exporting capabilites and easier alpha map and lightmap creation abilities. The user may want to investigate this option as a simpler method of blended terrain creation.
Contents |
Overview
3rd-party terrain-building application Terragen can be used to create realistic heightmaps and lightmaps for use in Atlas, and when used with blended terrain, can create opacity maps and lightmaps that imply much more detail than can be expressed from your terrain alone.
Blended terrain in Atlas uses relatively small, tiling texures for its surfaces, each texture having its own large, seperate opacity map to define where, on the terrain, that texure is masked or revealed. This is much different than using unique terrain, which would require one large diffuse map to color the entire terrain and rely on a detail texture overlay for fine detail.
By using Terragen's excellent terrain mapping technology you can create much more realistic opacity maps to distribute your surface textures. using these in conjuction with a heightmap and lightmap created in Terragen can yield impressive results. This tutorial uses Terragen version .9x, not Terragen 2.
Note: the terrain in this example was created to support a high-end foliage demo, and was created at a much larger size and resolution than is probably necessary for your project. It used a 4097x4097 heightmap with 2048x2048 opacity and lightmaps. Depending on the scope of your game, I would at least recommend cutting those dimensions in half.
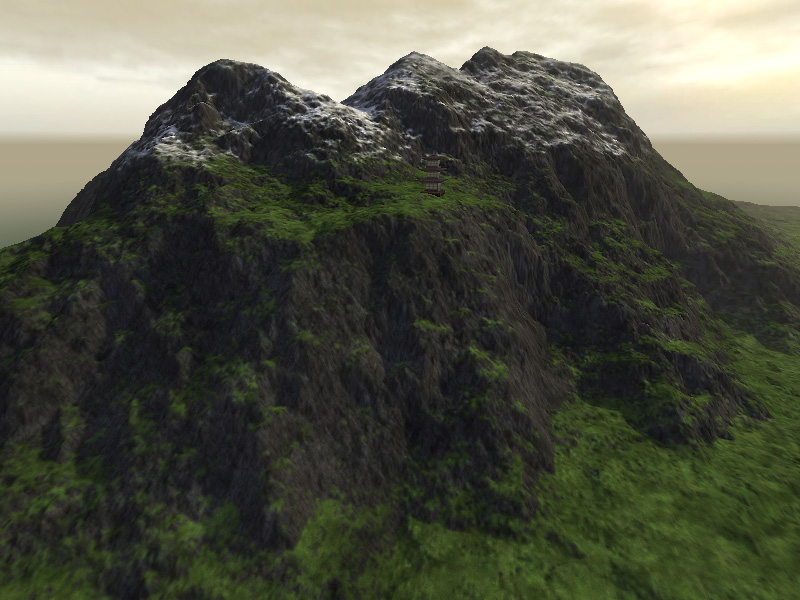
The example that will be used in this tutorial is a mountainous island with four surfaces:
1) a base rock texture
2) a mossy/grassy texture
3) a sand texture near water edges
4) a snow texture for snowcaps

 |
 |
 |
 |
The files used to create this environment are:
Ground textures - Tiling .jpgs of rock, grass, sand, and snow, 256x256 to 512x12
Detail texture - Noise texture used to break up repeating ground textures, 256x256
Heightmap - 16 bit .raw file. This is the file containing height information, 4096x4096
Opacity maps - Large grayscale maps that mask or reveal a texture on the terrain, all placed as channels in one RGBA file, 2048x2048
Lightmap - Large texture that adds ground shadows to the Atlas terrain, 2048x2048

Creating the Terrain
Terragen's Terrain Genesis pane is a good place to start building your terrain, due to it's natural ability to create realistic land shapes. Specific Terragen tutorials are beyond the scope of this resource, but there are a number of resources (1/2) on the web for learning about Terregan.
I would highly recommend creating a square terrain. If/when you are happy with your terrain, the final heightmap can be exported from Terragen's Surfaces Pane and you can skip to the Exporting the Maps for Atlas section below. If your terrain needs some additional tweaking, move on to the next section.
Customizing the Terrain Shape
As great as Terragen is at generating realistic land masses, its editing tools are a little slim. So at this point it's time to use another terrain sculpting application. Popular favorites include Leveller, EarthSculptor, and FreeWorld3D, among a slew of other programs found at the Terragen resources page. When using a sculpting app to modify an existing Terragen terrain, some use a 16-bit heightmap exported from Terragen's surfaces pane, and some can use saved Terragen .ter terrain files.
Typical uses for this step might be to add in roads or other useful landmarks. In my particular case I needed to clean up the edges of my terrain to make sure they were underwater and smooth out an unwanted ridge.
Once terrain editing is complete, the new heightmap will then need to be imported back into Terragen for surface mapping and exporting of opacity maps, and lightmaps. The heightmap you have created in this step can be used as your final heightmap in Torque.
(Note: it is possible to build a terrain from scratch in a terrain-sculpting application and bring it into Terragen to add a pass of realistic features.)
Exporting the Maps for Atlas
This is where Terragen really shines. Set up your surfaces in the surfaces pane for your environment (again, for this example I used dark rock, moss/grass. beach near water, and snowcaps). The specific color is irrelevent, since you'll just be making grayscale masks out of them, but a color close to your texture maps will help visualize the final environment. Tweak the distribution of these in the Landscape>Surface Map>edit>Surface Layer pane.

The opacity maps are exported one at a time by changing all the surface colors to white except for the one you are exporting, which should be set to black.
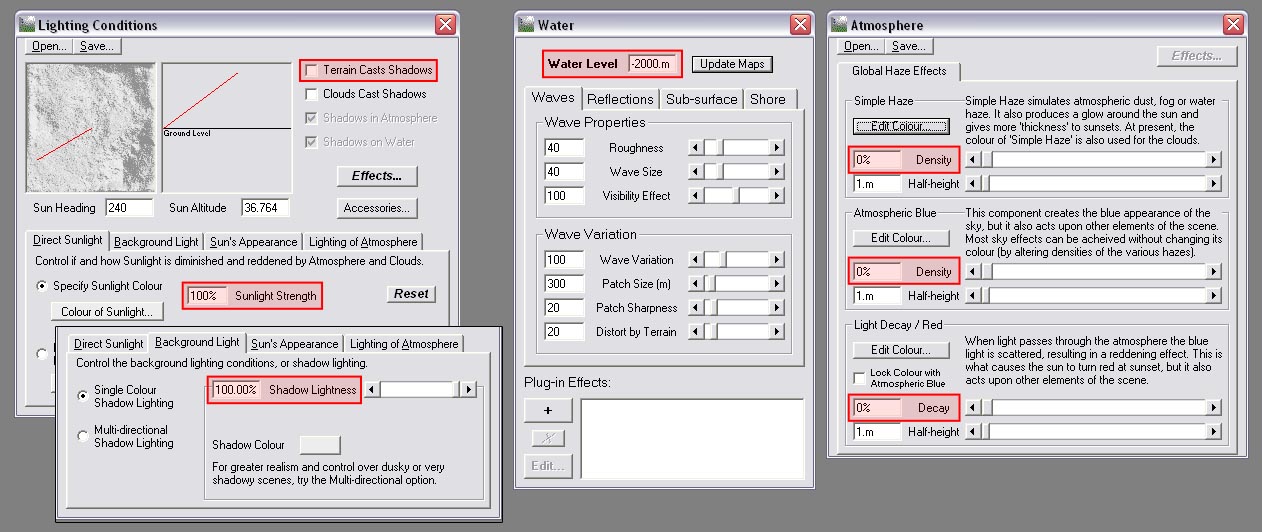
Once the surface distribution is set up, you're ready to start exporting your maps. The base texture doesn't need to be exported since it will cover the entire terrain. So essentially what needs to be done is that an orthographic rendering from directly above your terrain needs to be taken, without fog, water, directional light, or shadows created by the terrain. I did this by going to the Lighting Conditions pane and turning off the Terrain Casts Shadows option, setting the sun strength to about 100%, and setting the Shadow Lightness to 100%. Also lowering the water line entirely below the terrain and turning off all atmospherics.

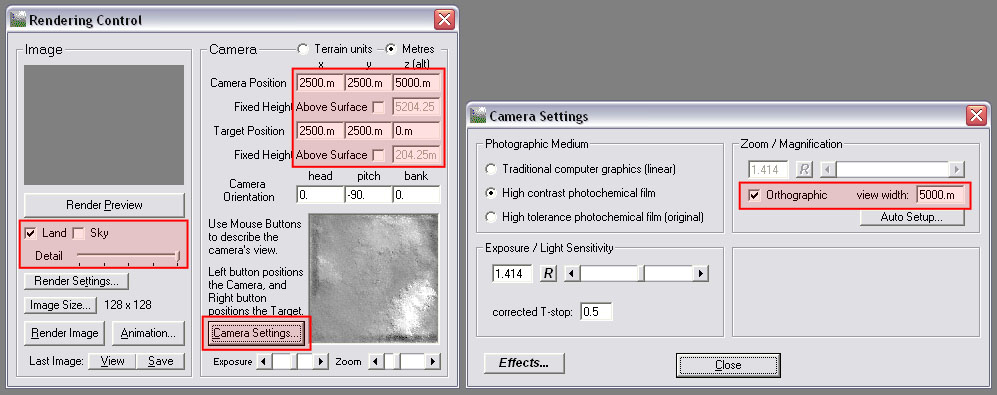
The map in this example was 5000x5000 meters in Terragen, so I set the camera and target position at 2500x2500 facing straight down. In Camera Settings make sure to click orthographic and set the view width to the size of your terrain... in my case 5000m. Set your Image Size to your preferred size.

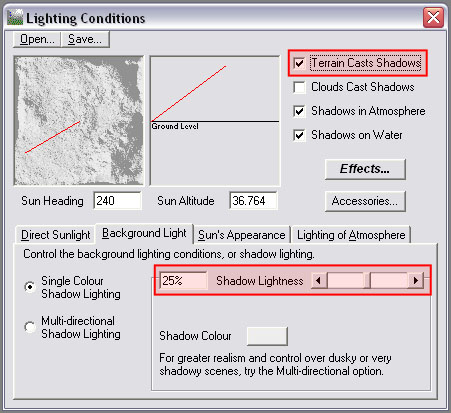
A lightmap was rendered in a similar way, but with the lighting settings left on, including Terrain Casts Shadows, Shadow Lightness returned to its normal setting, and all surface textures set to white. Camera and render settings are kept the same as opacity map exports.

Preparing the Maps in Photoshop
Your lightmaps, heightmaps, and opacity maps will need some tweaking and formatting before getting into the engine.
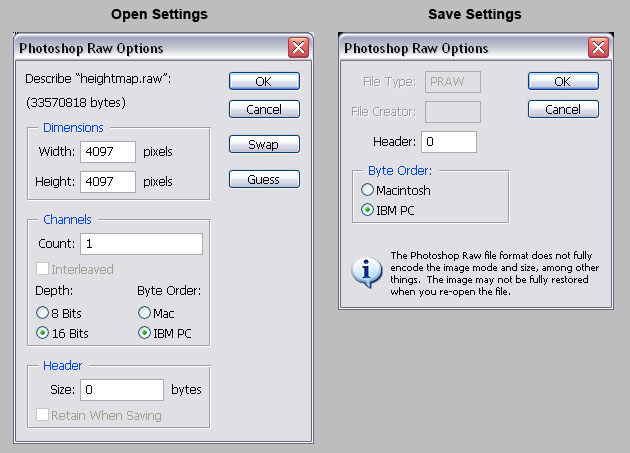
Heightmap - The heightmap may need need to be flipped and/or rotated to line up correctly with your other maps in Torque. They will need to be retained as 16-bit .raw files. When opening and saving these files in Photoshop, use the following settings (except for dimensions... those should stay the same):

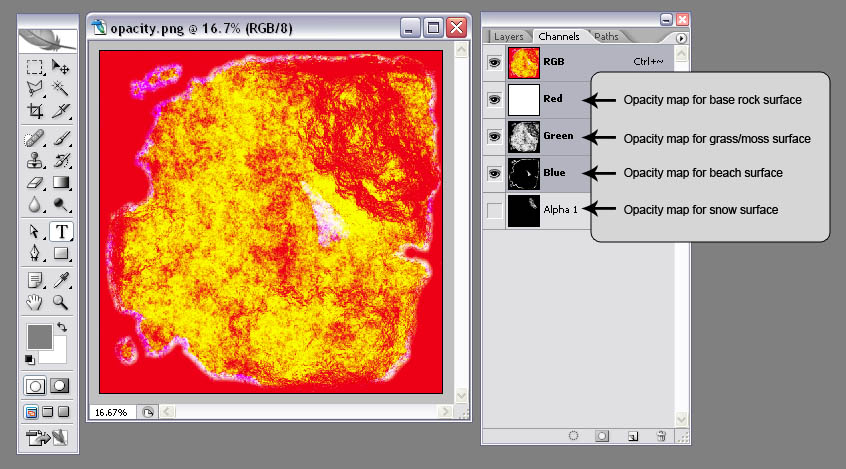
Opacity maps - The colors of your grayscale opacity maps will all need to be inverted, and the maps themselves will be pasted into the channels of an RGBA .png file. This means creating an alpha channel in addition to the standard Red, Green, and Blue channels.

Each channel will mask or reveal your ground textures in the terrain. The ground textures correspond to the channels like this:
Red channel - tile1.jpg (base surface layer)
Green channel - tile2.jpg (second surface layer)
Blue channel - tile3.jpg (third surface layer)
Alpha channel - tile4.jpg (top surface layer)
Lightmap - In this example, I took the greyscale lightmap and made the white areas yellower and the darker areas more purple, just to add a little more realism and get that bluish look on the shadow side of the snowcaps. This step isn't necessary, but might make you more popular among your circle of friends who are really into Torque terrain generation. Just think of it.

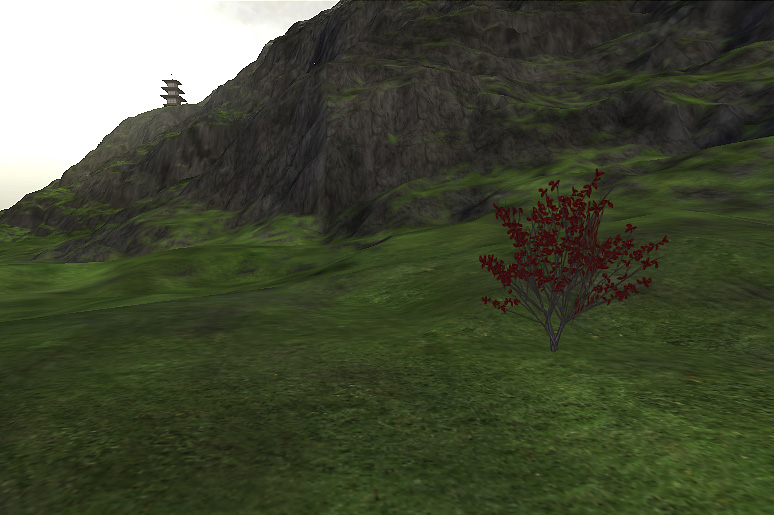
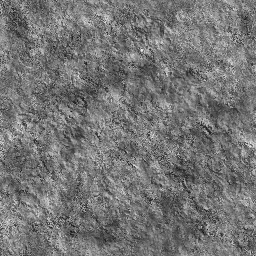
Detail map - Using blended terrain with opacity maps allows you to get a fairly detailed texture in the ground from your ground textures (see example at left), so it's possible to use the detail texture as a broad noise to break up any repetition from the ground textures from a distance. Quite the opposite of what it is intended for... to create a tight pattern that adds detail. Below you can see the grass from a distance with and without the broad detail texture:

In this case, the detail texture was repeated 3 times across each dimension of the terrain (using this fix). The texture was created in Genetica and is just a stringy noise pattern. You can download it here.
Conclusion
So to recap, the relevent files you should now have in your terrain directory should be:
 detail.png
 heightmap.raw
 lightmap.jpg
 opacity.png
 tile1.jpg
 tile2.jpg
 tile3.jpg
 tile4.jpg
And that's all that is needed to create a four-surfaced blended terrain. You're ready to generate your Atlas terrain and have everything running in the engine.
