|
Introduction
This tutorial focuses on setting up a new project that will be ready for use with the Platformer Starter Kit (PSK) and building a simple level from the ground up. You will be required to have a moderate understanding of Torque Game Builder (TGB) and Torquescript in general, as some aspects of the kit will require you to implement some basic code. After completing this tutorial, you should have a firm grasp on how to develop a project using the PSK.
For a more in depth understanding of what drives the kit, you can view the PSK's Framework here. |
Getting Started
- Open up TGB and open the "New Project" dialog. In the "Project Template" drop down menu, select "Platformer" and then create the project.
You will notice that the project has already imported all of the required assets (images, sounds and scripts) and defined all of the required animations for our characters. Characters that interact with the world are known as "Actors" (see the PSK's framework for more explanation) and use a very particular animation system. The following naming convention is used for all actor animations and sounds:
<Datablock Prefix><State Name><"Animation" / "Sound">
There are 15 states by default:
- Idle
- Run
- RunJump
- RunFall
- Slide
- Jump
- Fall
- ClimbIdle
- ClimbUp
- ClimbDown
- ClimbJump
- Action
- Damage
- Spawn
- Die
Since we're using a Dragon actor, the datablock prefix that we'll be using is "Dragon". If you create an animation for the "Idle" state, your animation name should be:
"DragonIdleAnimation"
Not all projects are going to require different types of jumping/falling animations for your actor, so these types of states have "fallback" animations, whereby they will just use the regular jump/fall animations if you do not have an animation for them. You may add your own animation states through script, for more information see the "ActorAnimationBehavior.cs" file.
All of the animations for the dragon and drill actors have been created so all that is left to do is create the level. Onwards! |
Creating a basic level
- Drag out the "sky_duskImagemap" onto your scene and make it large enough to act as a sky background for your scene.
| |
Position: |
0, -50 |
| |
Size: |
600 x 250 |
| |
Flip Y: |
true |
| |
Layer: |
30 |
| |
|
|
- Create a new tilemap with the following settings:
| |
Position: |
0, 50 |
| |
Size: |
200 x 50 |
| |
Tile Count: |
20 x 5 |
| |
Tile Size: |
10 x 10 |
| |
Layer: |
15 |
| |
|
|
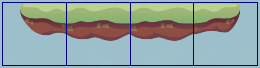
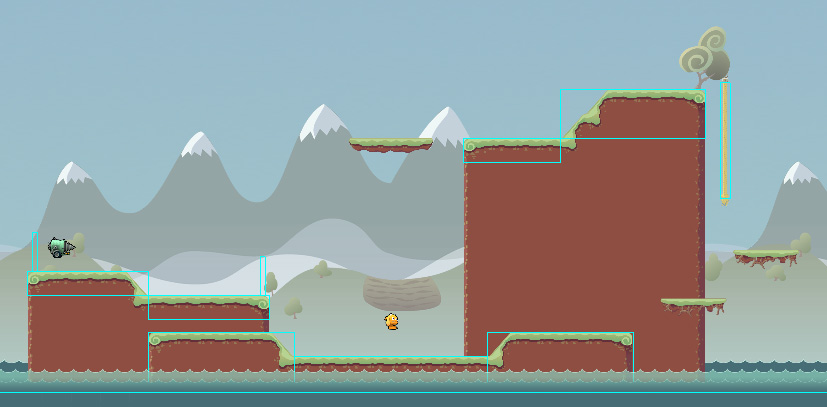
- Fill your tilemap so that it looks like the picture below. It will form as a basic ground platform for our actors to run across.
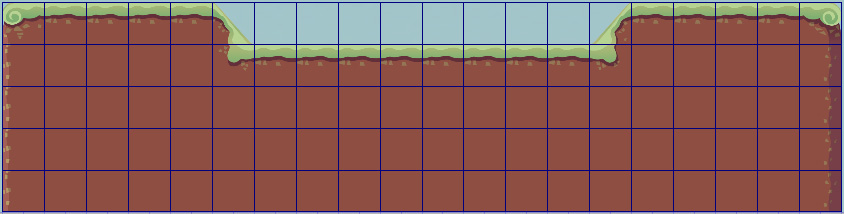
The tilemap itself will not store the collision information, as TGB only allows for convex polygons. To avoid this, we will use three separate t2dSceneObjects to act as the actual platform object.
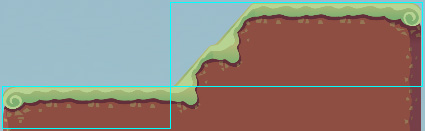
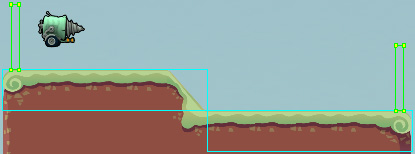
- Drag out 3 scene objects and arrange them like below.
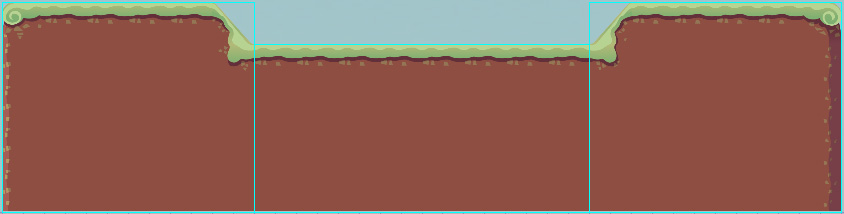
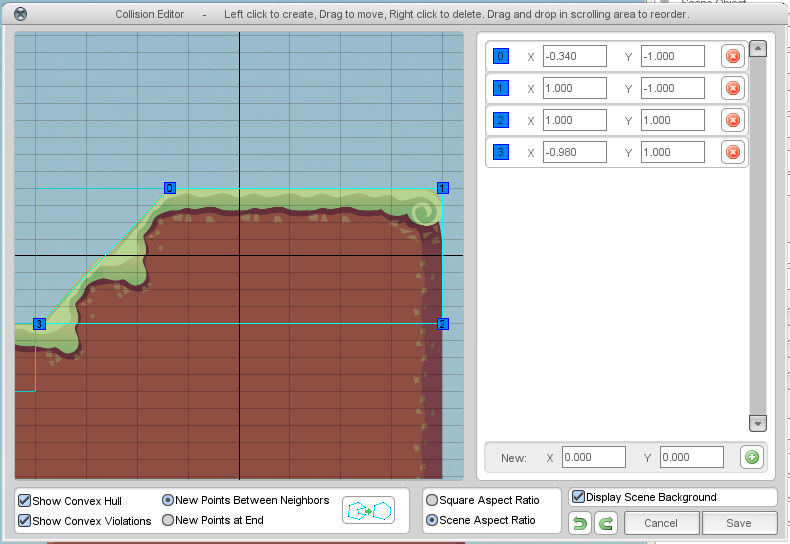
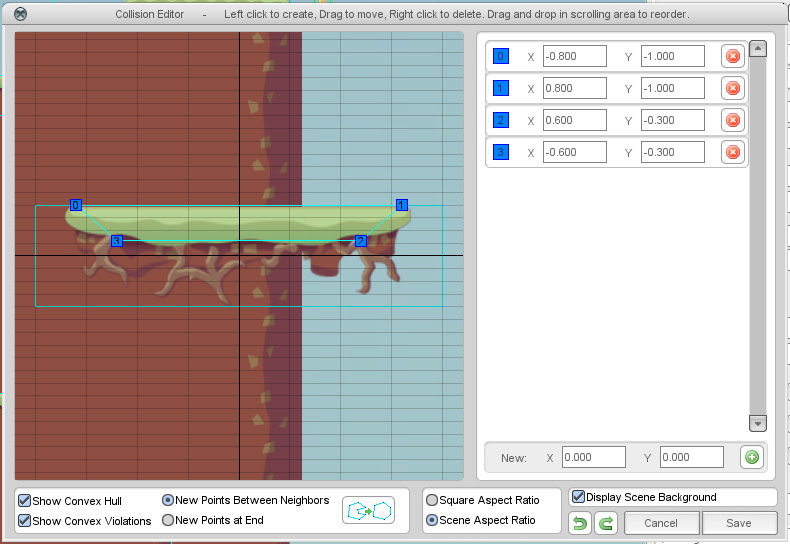
- Edit the collision polygons of the two outer objects so that it covers the ground and nothing more.
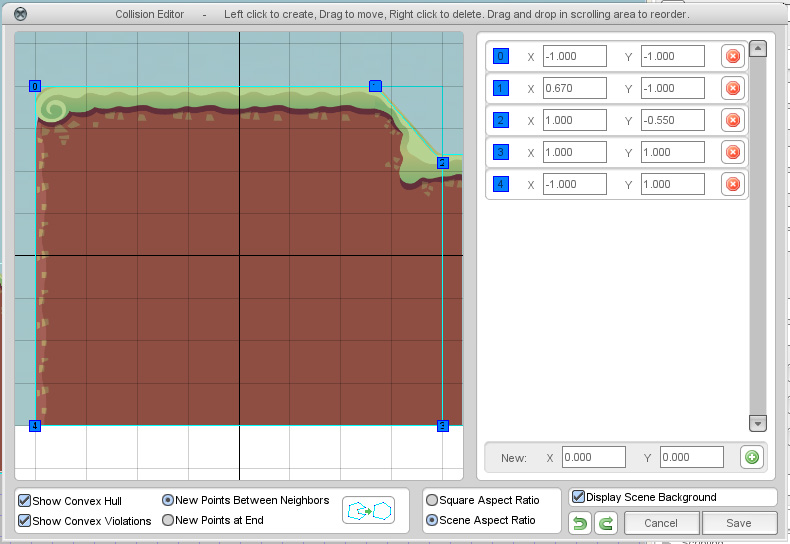
- Once you have the collision polygons set up, add the "Platform Object" behavior to each of the scene objects. Leave "OneWay" unchecked. This will mean we can collide with the walls of the platform object.
- Create a new tilemap with the following settings:
| |
Position: |
80, 0 |
| |
Size: |
100 x 150 |
| |
Tile Count: |
10 x 15 |
| |
Tile Size: |
10 x 10 |
| |
Layer: |
15 (push behind the previous platform) |
| |
|
|
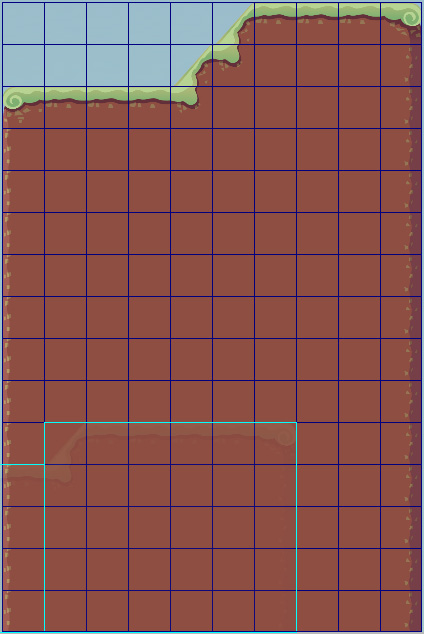
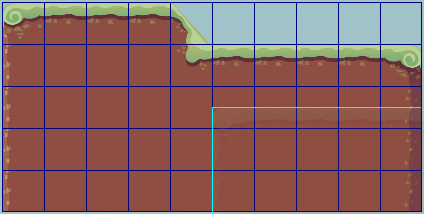
- This new platform will be our first "OneWay" platform. This means that our actor will be able to jump up through the ground, but land when he approaches it from above.
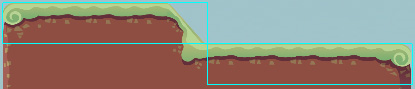
- Drag out 2 scene objects and arrange them like below.
- Modify the collision polygons of the two objects just as you did before.
- Add the "Platform Object" behavior to both of the scene objects and check "OneWay".
- Create a new tilemap with the following settings:
| |
Position: |
-100, 25 |
| |
Size: |
100 x 50 |
| |
Tile Count: |
10 x 5 |
| |
Tile Size: |
10 x 10 |
| |
Layer: |
15 (push behind the previous platform) |
| |
|
|
- Create another two "OneWay" platform objects to act as the ground for that platform.
Now that we have a few platforms to run around on, we're going to need to actually create the player. |
Creating a Player
Actor definitions must be predefined in a "t2dSceneObjectDatablock" object. The one we will be using is named "DragonActorTemplate" stored in the "datablocks.cs" file in your game directory. I've added this datablock to the managed set so it can be accessed through TGB's level editor, which means we can use it in a spawn point.
- Create a sprite that represents the type of actor you will be spawning. In this case I used DragonIdleAnimation.
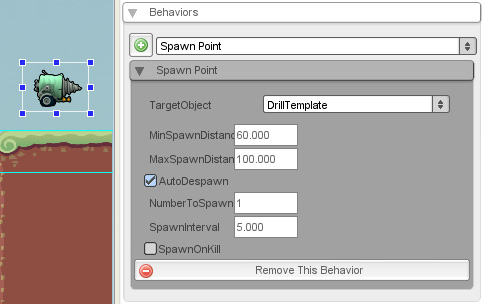
- Add the "Spawn Point" behaviour to the sprite.
- Change the "TargetType" field to "pskActor".
- Change the "TargetObject" field to "DragonActorTemplate".
- Change the "MinSpawnDistance" to 0.
- Uncheck "AutoDespawn".
That's it. Spawn points are a really easy way of creating and managing objects on the fly. Now that we have an actor to control, lets test out the level we've made.
Note: If you find that there is a platform you fall through, just make sure that you have added the "Platform Behavior" to the object! |
Creating an Enemy
In most cases, enemies try to behave like the players do. In this case, we're going to create a basic enemy which will walk from side-to-side along the platforms, interacting with the world in a similar fashion to our player. The enemy we're going to create is a "Drill" and his template is stored in the "DrillActorTemplate" datablock which will be used by our spawn point.
- Drag out the "DrillIdleAnimation" onto the scene with the following settings:
| |
Position: |
-136, -10 |
| |
Size: |
16, 12 |
| |
|
|
- Add the "Spawn Point" behaviour to the sprite.
- Change the "TargetType" field to "pskActor".
- Change the "TargetObject" field to "DrillActorTemplate".
If you ran the level at this stage, you should be able to run over to the drill and see him walk towards you and then fall off the end of the platform (provided you don't bonk him on the head first). We're going to define points so that the lil' guy can turn around, ensuring he doesn't fall off the edge.
- Create a new t2dTrigger with the following settings:
| |
Position: |
-147, -8 |
| |
Size: |
2, 16 |
| |
|
|
- Add the "Enemy Turn Trigger" behaviour to the trigger.
- Duplicate the trigger and change the following settings:
| |
Position: |
-53, 2 |
| |
Size: |
2, 16 |
| |
|
|
The triggers are sufficiently large so that it will always catch the Drill and make sure he turns around properly. The "Enemy Turn Trigger" is designed so that only enemies can collide with them, meaning if our player steps through them he won't be forced to turn around. Enemies also turn around when they hit a solid wall which means you don't need to add a turn trigger on the edge of a wall. |
Creating a Rope
- Place "stuff_tree1ImageMap" onto the scene and move it on the right hand side of the new platform.
| |
Position: |
130, -87 |
| |
Rotation: |
20 |
| |
Layer: |
16 |
| |
|
|
- Create a new tilemap with the following settings:
| |
Position: |
136, -53 |
| |
Size |
7, 105 |
| |
Tile Count: |
1 x 8 |
| |
Tile Size: |
7 x 7 |
| |
Layer: |
16 (push behind tree) |
| |
|
|

- Drag out a trigger object, placing it over the top of the newly created rope and resize it to fit, ensuring that the top of the trigger does not extend past the top of the rope.
- Add the "Ladder Object" behavior to the trigger.
|
Creating a Falling Platform
- Place "platform_reformAnimation" onto the scene and set the following parameters:
| |
Position: |
125, 15 |
| |
Layer: |
15 |
| |
|
|
- Add the following 2 behaviors:
| |
"Platform Object" |
|
| |
"Falling Platform" |
|
| |
|
|
- On the "Platform Object" behaviour, set the following:
- On the "Falling Platform" behaviour, set the following:
| |
FallAnimation: |
"platform_crumbleAnimation" |
| |
RecoverAnimation: |
"platform_reformAnimation" |
| |
|
|
- Duplicate this object and change the new object's position to:
| |
Position: |
155, -5 |
| |
Layer: |
15 |
|
Creating a Moving Platform
- Create a new tilemap with the following settings:
| |
Position: |
0, -50 |
| |
Size |
40 x 10 |
| |
Tile Count: |
4 x 1 |
| |
Tile Size: |
10 x 10 |
| |
Layer: |
15 |
| |
Velocity: |
0, 10 |
| |
World Limit: |
Mode: |
Bounce |
| |
|
Min: |
-25, -55 |
| |
|
Max: |
25, 25 |
| |
|
|
|
- Add the "Platform Object" behavior and enable One-Way
|
Adding Detail - Water
- Create 3 "water_btImageMap" scrollers with the following settings:
| |
Position: |
0, 41 (Layer 16)
|
| |
|
0, 45 |
| |
|
0, 49 |
| |
Size: |
600 x 10 |
| |
Repeat: |
50 x 1 |
| |
Scroll Speed: |
-3, 0 |
| |
Layer: |
0 (except for the first one) |
| |
|
|

- Drag out the "water_blImageMap" with the following settings:
| |
Position: |
0, 69 |
| |
Size: |
600 x 30 |
| |
|
|
- Create a new trigger with the following settings:
| |
Position: |
0, 67.500 |
| |
Size: |
600 x 35 |
| |
|
|
- Add the "Area Damage" behavior to the trigger and set the "Amount" value to 100.
|
Adding Detail - Parallax Scrollers
- Create a "scroll_mountainsImageMap" scroller the following settings:
| |
Position: |
0, -10 |
| |
Size: |
600 x 128 |
| |
Layer: |
30 |
| |
Repeat: |
2 x 1 |
| |
|
|
- Add the "Parallax Scroller" behavior to the newly added scroller and change the "ScrollRate" to 0.750.
- Create a "scroll_hillsImageMap" scroller the following settings:
| |
Position: |
0, 10 |
| |
Size: |
600 x 64 |
| |
Layer: |
30 |
| |
Repeat: |
2 x 1 |
| |
|
|
- Add the "Parallax Scroller" behavior to the newly added scroller and change the "ScrollRate" to 0.300.
|


