|
Introduction
Welcome to the Torque Game Builder Fish Game Tutorial set. This tutorial set will take you through creating a very simple and basic fish-themed game in the Torque Game Builder. This tutorial is ideal for those new to coding and/or scripting, as well as those who are familiar with it but new to Torque Game Builder (TGB). This is divided into multiple steps with each step being a different document, making it easy to follow, and pick up at a later time.
You will see reference numbers for Code Samples as they are presented throughout the document. These numbers are references for finding the code samples in .txt format. The name should parallel the .pdf file name, and the file is located in the Code Samples folder. (This is especially for those who have issues copying and pasting code from .pdf files).
Starting Out
Create our project
Our first step is to create a new project in Torque Game Builder. To do this, we must first open TGB. After loading the application, you should be presented with the TGB Level Builder. Creating our project from here is very simple. Just click the File menu, and then click the New Project... option (as shown in Figure 1.1.1).
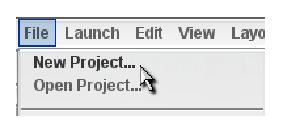
Figure 1.1.1
Now, you should be presented with a dialog asking for the name of your new project. Name it “MyFishGame†and then click the Create button (as shown in Figure 1.1.2).
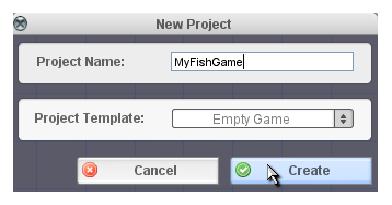
Figure 1.1.2
As you can see we leave Project Template at “Empty Game.†We do this so we can have a clean slate to work on. We will take our fish images from the Fish Demo, and then create TGB images out of them using the Builder.
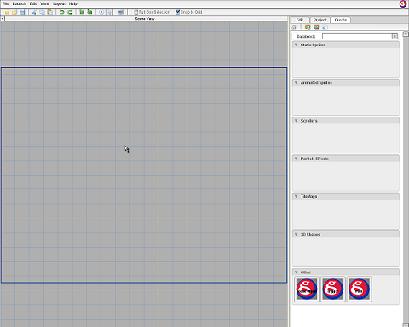
Figure 1.1.3
After you click Create, you should be presented with your new project. It has a fairly bare Object Library in the right panel (as shown in figure 1.1.3). As you can see, with just a couple of clicks you can have a new project.
Bring over any needed images
We already have all of the images we need for this game in the Fish Demo. So all we need to do is bring them over into our new project. First we need to copy over the actual image files into our image folder inside our project folder. To do this, browse into your games folder. In there go to the fishdemo/client/images folder. Here are all the images we need for our game. In fact, we don't even need all of these , so select the following files :
- background.jpg
- fishimages.png
- rocksfar.png
- rocksnear.png
- wave.png
Thats it! With those selected, copy them.
Now, lets browse to our own project's image folder. Go back to your games folder, and this time browse out to MyFishGame/data/images and paste the images there. Our first step is done.
Our next step involves bringing them into the TGB Level Builder by using the Image Map Builder tool. First, fire up the TGB application. There are two ways to bring up the Image Map Builder. You can either browse out to the Launch->Image Map Builder menu (shown in Figure 1.2.1) or you can click the Image Builder quick launch icon in the Create tab (shown in Figure 1.2.2).
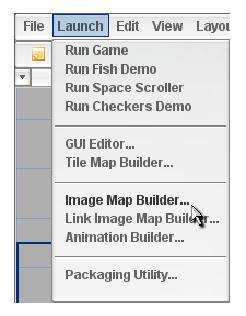 | 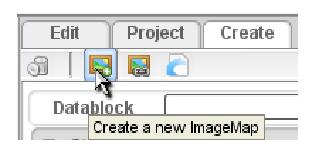 |
| Figure 1.2.1 | Figure 1.2.2 |
Once you bring up the Image Map Builder, by either way presented, you should see a file browser with a space for an image preview (as shown in Figure 1.2.3).
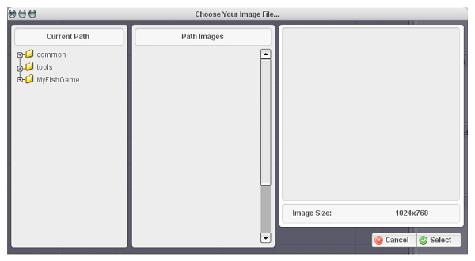
Figure 1.2.3
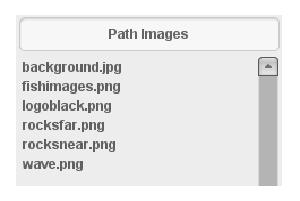
In here, you can browse through the directories within your Fish Game project to find the images you want to import into the Level Builder “Image Map†format. When you click on an image, you'll see a preview. This will help to gauge how the image will look after importing. To find our first image, browse out to MyFishGame/data/images (as shown in Figure 1.2.4). Once you click the “images†folder you should then see the five images we copied, as well as an already existing “logoblack†image. Select background.jpg, and you should be able to see the preview of the background seascape (as shown in Figure 1.2.5). Also note that it gives you the image's width and height.
 | 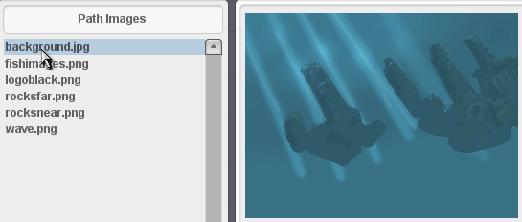 |
| Figure 1.2.4 | Figure 1.2.5 |
With the background.jpg selected (and showing correctly in the preview), click the Select button. A new dialog should be brought up. The image preview still shows in our right window, but more settings are available on the left. This is the actual Image Map Builder. Here, we can do quite a few things that will effect numerous properties of our image (as shown in Figure 1.2.6).
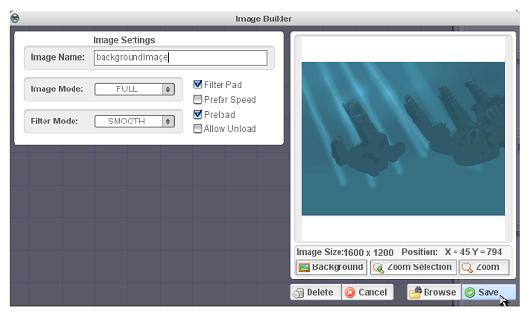
Figure 1.2.6
The most important setting for our images is the Image Mode setting. The default is FULL. This means that the entire image will be used for the image map; which is what we want in this case. The other options are CELL and KEY. These allow you to divide up a single image into multiple image maps. So in this case, all we have to do is hit Save, since all of the default settings work perfectly for our image.
When you hit Save it should close the dialog and then show our image in the Static Sprites list as well as the Scrollers list (as shown in Figure 1.2.7).
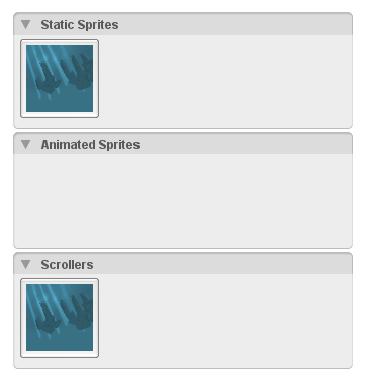
Figure 1.2.7
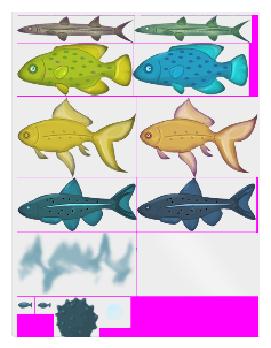
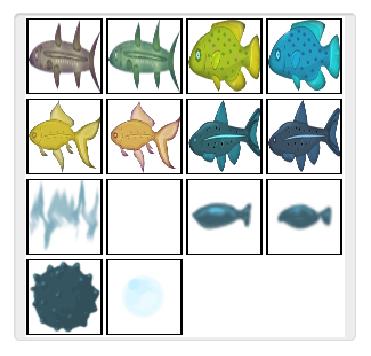
Now we can move on to our next image. Bring up the Image Map Builder again and you should be prompted to browse for a file. This time you should select fishimages.png. In the preview you'll notice that the image is really numerous images with a pink background behind them (as shown in Figure 1.2.8). This image set is using the KEY image mode I mentioned before. This mode sees all of the images inside a specified color background as one image. In our case, the background is a bright pink, which works well since images usually don't have pink around their borders. Press the Select button to bring up the Image Map Builder dialog. The one setting you need to change this time, is the Image Mode dropdown. Change it from FULL to KEY mode. When you select the KEY mode, the preview should change to show each image in its own box (as shown in Figure 1.2.9).
 |  |
| Figure 1.2.8 | Figure 1.2.9 |
What this means, is that now our image is no longer one FULL image. KEY mode has used the bright pink background as a guide to separating the image set into 14 frames,. We can now reference each frame as if it were its own image map. As you can see, this provides us with a lot of different and useful images in just a single image file. Now we can complete the creation of this image map by clicking on the Save button. After the dialog closes, you should see the image map added to the Static Sprites object library, though this time not to Scrollers (as shown in Figure 1.2.10). It doesn't get added to the Scrollers because only a FULL image map can be a scroller.
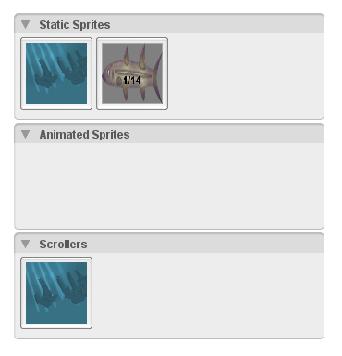
Figure 1.2.10
The image that is shown is just the first frame (as its properly numbered 1 of 14). To cycle through the image frames, simply single left click on the image icon. Right click to cycle backwards.
Next, we need to load in the rest of the images. Fortunately the rest are just FULL images like our first one. So it's a simple process of loading the Image Map Builder, browsing to the file, selecting, then clicking Save. Proceed to load the following images in as FULL mode image maps (you can use our first image, background.jpg, as an example if needed): rocksfar.png, rocksnear.png, and wave.png. After you finish, your static sprites library should have all of the images in it (as shown in Figure 1.2.11).
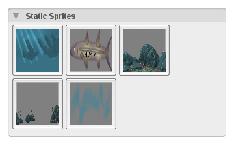
Figure 1.2.11
Finished!
We have successfully completed the first step in our Fish Game! We now have a new project and the proper images loaded into the Level Builder, to begin creating our level and fish. In our next step, we will set up keys to control the movement of our fish.
Continue on to Part 2 - Moving our Fish
|


