|
Welcome to Torque!
Congratulations on your purchase of the Torque Game Engine. This tutorial will walk you through most of the basic features of Torque, and will be a jumping off point for making your own games. By the end of the tutorial, we'll have already made a simple 3D game!
A couple quick notes before we dive in... In this tutorial, when you see something like 'select File>Open Mission,' it means to click on the Open Mission item in the File menu. As far as file locations go, it is assumed that you installed Torque in the default Torque/SDK folder. Also, this tutorial was written for PC type controls, so if you're on a Mac, we strongly recommend a two button mouse and you'll use option-key instead of Ctrl-key. In addition, the files that are actual programs, what are referred to as 'binaries' on a Mac, will be called 'executables' here.
The Start Page
In the folder Torque/SDK/example, you'll find the torqueDemo executable. When you run torqueDemo you'll see this start page:
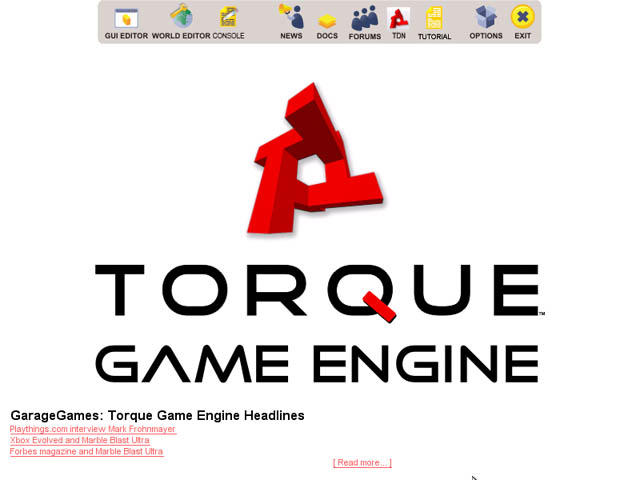
The set of icons at the top are handy links to TGE tools and docs. The GUI Editor is for making your graphic user interfaces. The World Editor is for shaping your game world and adding objects. The Console provides direct script command access to the engine via text interface. We'll be exploring the GUI and World editors in this tutorial, and we'll take a quick look at the console in a second. The TDN, News, Docs, and Forums icons are links to web pages with info about Torque. Tutorial is a link to this document. Options gives you access to general graphics and audio options for the engine, like screen resolution and volume. And finally, Exit does just what you would expect it to... quits out of the engine.
We're not going to go too deeply into the Torque console in this tutorial, but just to give you an idea of what it's for, click on the icon. In the console window you can see a record of what the engine has done since starting up. Not only can you use the console to get text feedback, you can also directly enter commands into the bottom text area. As a simple example, enter the command "quit();" right now. Sure enough, this command quits out of TGE.
NOTE: References to further information can be found at the end of this document.
Game Files
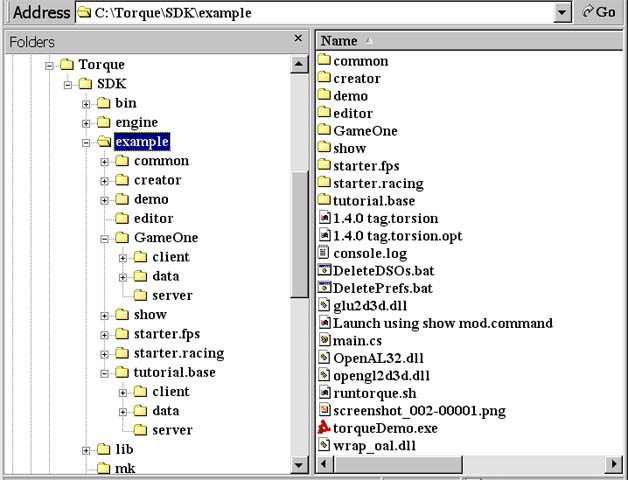
In order to make our tutorial game, we'll need to set up a new project and take a look at the file structure. In the standard TGE setup, the folder where the actual games are located is Torque/SDK/example. Go there, and you'll see some folders with different example games in them. We're going to base our game on the tutorial.base folder, so make a new copy of tutorial.base (with all its contents) in the example folder. Rename it to 'GameOne', which is what we'll be calling our example game.
The root of your game data is defined by where the Torque executable is. In the example folder, that executable is called torqueDemo, but when you're ready to distribute you can change that to whatever you want. In the same folder as torqueDemo, there will be a script file called main.cs, which is the first thing that the Torque engine looks for when the executable is run. Go ahead and open the Torque/SDK/example/main.cs file with your text editor of choice. We won't go into the details of the script here, but if you look near the top of the file there's a line that says '$defaultGame = “tutorial.baseâ€;'. That line (combined with a couple others later in the file) tells the Torque engine where to look for the rest of our game files. Change the defaultGame line to say “GameOne†instead of “tutorial.base†and then save the script file. Note that defaultGame is case sensitive, so be sure to capitalize 'Game' and 'One'. When you run torqueDemo now, it will know to look for all resources in the GameOne folder.
Let's take a look a little deeper into the GameOne folder. Open it up and you'll see some more scripts and a few folders. Again we won't go into too much detail, but basically the scripts in this folder contain more start up info for our tutorial game, the client and server folders contain the meat of our game scripts (we'll look at those a little later), and the data folder contains all our resources, like models, textures, sounds, and a few scripts that deal directly with those resources. After running Torque for the first time, you'll also notice that for every .cs file there is a corresponding .dso file. The .dso files are compiled versions of the .cs script files. The engine will automatically recompile your scripts if your .cs file has changed since the last run.
Now that we have our game files set up it's time to jump into the engine. Go back up a folder to Torque/SDK/example and run torqueDemo. The opening page will have some button icons at the top. We're going to start by learning about the World Editor, so go ahead and click on that button.
Movement
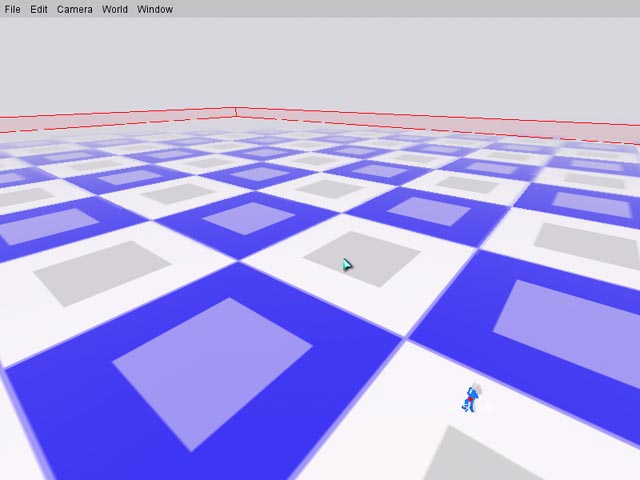
When you select the World Editor, you'll find yourself floating over a massive checkerboard. This is the default mission for the World Editor. The World Editor Inspector windows are open on the right side of the screen. For now, close them by selecting Window>World Editor (Hotkey: F2).
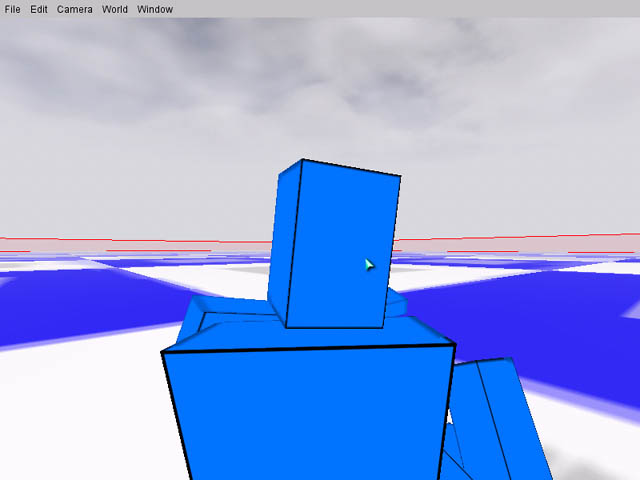
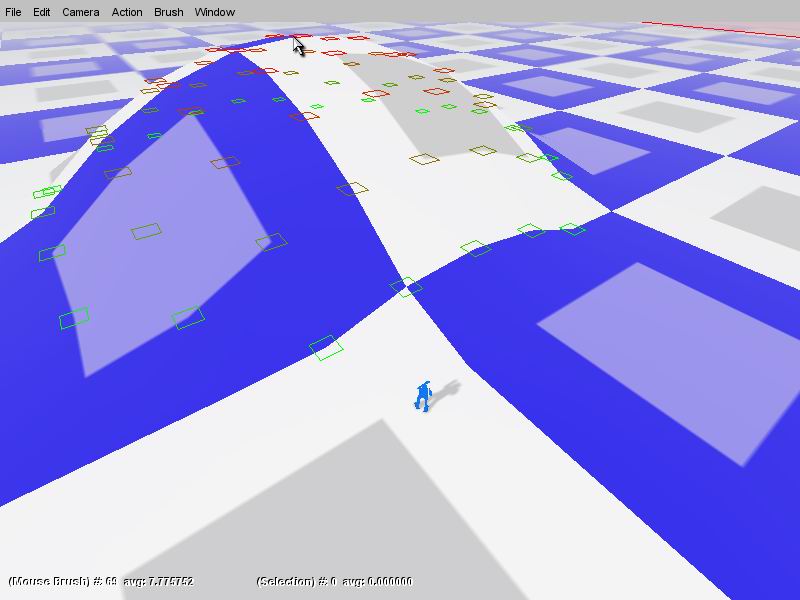
Now, before we get into editing our terrain, let's take a little time to get familiar with moving around in Torque. By default, you start looking from the perspective of a free-floating camera. Move into player view by selecting Camera>Toggle Camera (Hotkey: Alt C). If you right-click and drag in the window, you can look around. The keys W, A, S, and D actually walk you around the terrain. Moving around in this way gives you a feel for what moving around in your game will be like. Walk around a little bit and check it out. A cool feature to check out here is third person mode, which can be accessed by holding the right mouse button down and pressing the Tab key (shown in the screen shot above).
Now let's try going back to the camera view for a broader perspective. Detach the camera from the player by selecting Drop Camera at Player (Hotkey: Alt Q) again. Now you are floating above the terrain. From this perspective, right-clicking still looks around and W, A, S, and D still move around, but now without the constraints of gravity. You can change the speed of camera movement by pressing Shift 1-7 (see the Camera menu). Try looking around the terrain from above a little bit. If you get lost, Camera>Toggle Camera will bring you back to the player model. Note: The grey square floating in the air is the spot where the player starts.
Terrain Shaping
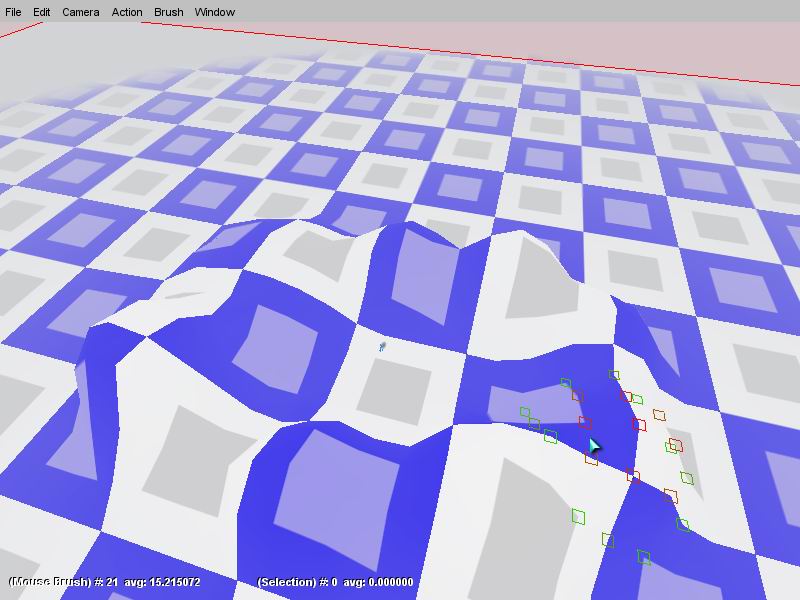
Cool. Now we can move around pretty effectively, so let's go on to actually shaping our own terrain. Move the camera to a place where you are looking down at the player from off to the side a little bit, then select Window>Terrain Editor. Now when you drag your mouse around the display, you'll notice a bunch of colored squares following it around. Those squares are the area of the terrain that you'll be affecting. Click somewhere around the player model and drag the mouse up and down and you'll see a mound form. Nifty! If you click on the Action menu, you'll see that what you're doing is called Adjust Height.
The default brush is a little big for our purposes here, so press Ctrl-Z to undo your new hill then choose Brush>Size 5x5. As you can see, this affects the number of red and green squares that follow the mouse around. Red indicates the area most affected by your actions, and green indicates the area least affected. Now, use your movement and Terrain editing skills to create a circle of hills surrounding the player model. Feel free to experiment with some different brushes while you do this.
When you're satisfied with your hills, choose Lighting Tools>Full Relight to update the lighting. Note that this relighting is automatically done when your scene is loaded, but when you change the terrain in the editor it needs to be updated manually for you to see the changes without reloading. Now select Camera>Toggle Camera and walk around the hills a little bit from the player's perspective.
Important: Sometimes when editing terrain, and this may have happened to you this time, the ground under the player's feet is adjusted in such a way that the player model ends up under the terrain. Whether or not this happened to you, give this solution a try... Camera>Toggle Camera back into camera mode then move the camera to a place above the terrain. Now choose Camera>Drop Player at Camera (Hotkey: Alt W). You will find yourself back in player perspective, falling from the point where you moved the camera to.
Before going on, select File>Save Mission As... Change the folder to GameOne/data/missions, and save your work as 'GameOneMission.mis'.
Terrain Painting
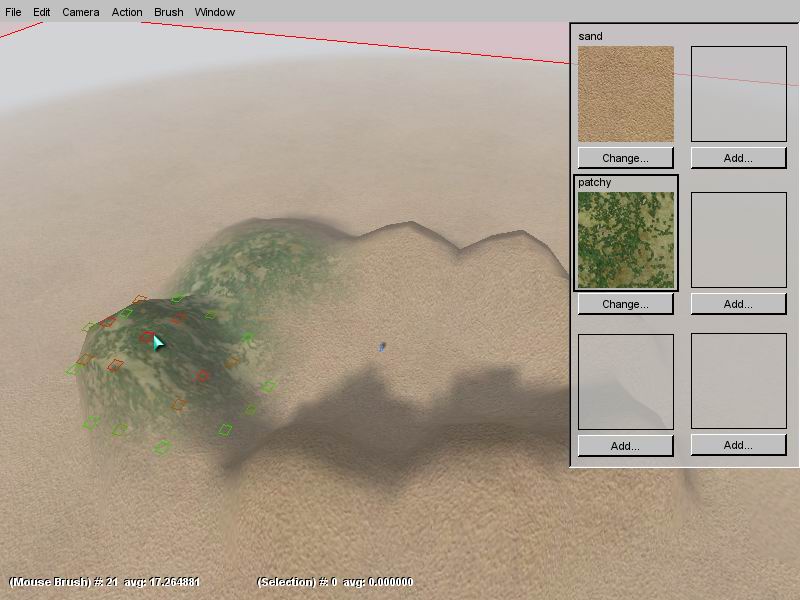
Now we're ready to get into some terrain painting. Go back to camera view and move to a perspective above the circle of hills, then choose Window>Terrain Texture Painter. The first thing we're going to do is make our scene look a little more natural by replacing the checkerboard. Press the Change button under the checkerboard in the texture window on the right side of the screen. Select sand.jpg texture from GameOne/data/terrains and press Load. Cool? Cool.
Now let's paint on some grassy areas. Click the Add... button under the empty texture area under your sand texture. Note: textures must be added sequentially in the Terrain Texture Painter. Now, select patchy.jpg then press Load. Clicking on the Action menu will show that your current Action has automatically been set to Paint Material. Now, when you click on the terrain, your brush area is painted with the patchy.jpg texture. Go ahead and try a few brushes to paint your hills. Notice that the patchy areas automatically blend into adjacent sand. You don't need to relight your scene when you paint terrain, only when changing the shape, so go ahead and walk around your new landscape and check it out a little bit.
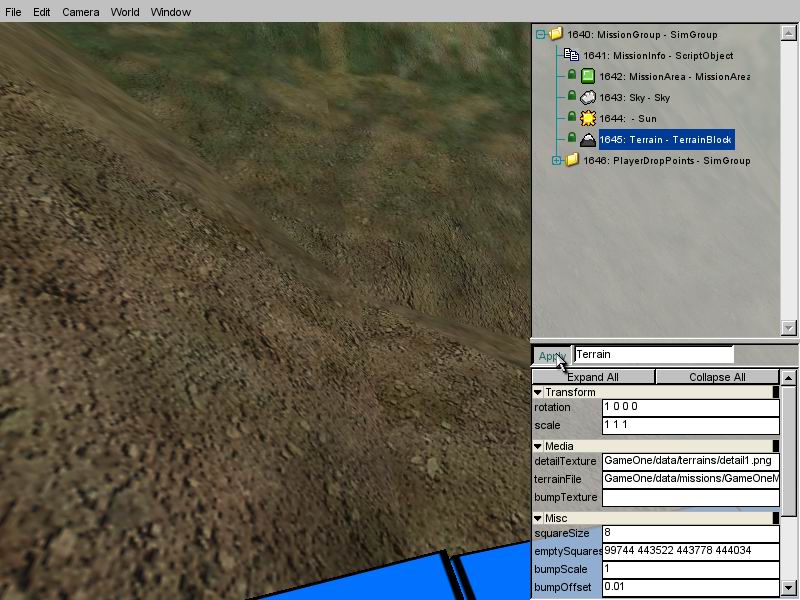
You probably noticed when walking around that even though the landscape looks cool from far off, it's a little bit funny looking up close because the terrain textures are so magnified. Torque allows you to use another texture, called a detail texture, as a sort of underlying close-up texture. Let's put one in and you'll see what I mean... Start by selecting Window>World Editor Inspector. Next, select Terrain – TerrainBlock from the MissionGroup in the upper right window, which is called the Tree View. When you do this, you'll see terrain data appear in the Inspector window below the Tree. In the Media section, find detailTexture, click the browse button (looks like 3 dots '...') on the right and find GameOne/data/terrains/detail1.png. Hit Load and take a look at the ground. Much better, no? Save your mission, and we'll move on to putting some objects in our game.
Placing Objects
Our game is starting to come together a little bit now... let's move on to adding objects to the world. When adding and moving objects in the world, it's best to operate from camera view, so if you're in player view mode, hit Alt-C. Select Window>World Editor Creator and take a look at the windows on the right side of your view. The top window, like in World Editor Inspector mode, shows the tree of things that are already in your mission. The Creator window below that shows a list of available things to put in your mission. As you can see by clicking on World in the menu, the default mode for placing objects is Drop at Screen Center, so turn your view so that the screen center is somewhere on the ground.
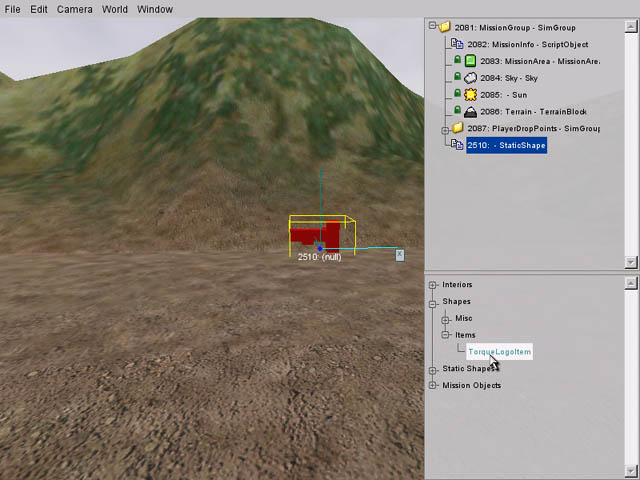
Now we're going to select the object that we want to place. In the lower right window, expand the Shapes list by clicking on the plus sign, then expand Items. Inside, you'll find the TorqueLogo object. Clicking on that list item will create a new logo object in the center of the screen. The logo appears with a yellow box around it, which means that it's selected. The number under it is its ID number, and the (null) is a placeholder for the object's name. There are also 3 blue lines on the X, Y, and Z axes which can be grabbed and used for moving the object around. Try out moving the logo around by dragging it and by dragging the axes.
Now select Window>World Editor Inspector and we'll check out another way to mess with our object. In the Tree window, you'll see the MissionGroup, which contains all the objects in our mission. If it's not already expanded, click the plus sign and you'll see the objects that make up the scene, like the sun, the sky etc. The 'StaticShape' object at the bottom is the logo we just created. Click on it, and the Inspector window will show all the properties of the logo. NOTE: If the StaticShape is already selected when you open the inspector, you will have to click on a different object in the tree, then on the StaticShape again in order to see its properties. Change the scale from '1 1 1' to '1 1 10' and hit the Apply button. That's kinda cool, right? Well, maybe not for our purposes... hit ctrl-Z to undo the scaling. Something more useful might be to name the object. The text input box next to the Apply button holds the object name, so type 'logo' in there and hit Apply. In this tutorial we're going to make a little game of collecting these logos, so go ahead and place 5 or 10 of them around the map.
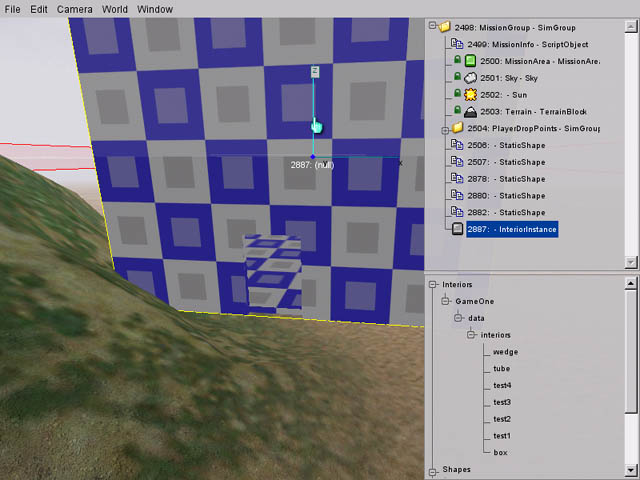
Smaller objects like the logos you just placed are called 'shapes' in Torque and are based on .dts files. The other main object type in Torque is called an 'interior' and is based on a .dif file. A rule of thumb is that if an object is big enough to walk in or on, you should use an interior. Lets place one now... start by expanding the Interiors>GameOne>data>interiors folder in the World Editor Creator window. Just like the logos, click on 'box' and our interior will appear at the screen center. Interiors are similar to terrain in that you need to relight the scene to see their texture mapping correctly. A dialog will come up prompting you to do this. Simply select Relight Scene and you'll see the box's exterior. Note that if you find yourself trapped in your new interior, you can Toggle Camera to get outside again.
The next thing to do after creating and lighting your box is to move it upward along the Z axis until its bottom is at ground level. If your box is on a hill, move it over to a flat area first. When you've got it right, go into Player mode and make sure you can get inside. The door is low down on one side of the box, so you may have to walk around it to find the way in. For a finishing touch, place one more logo inside the building. You may have to drag it into the building by hand. Save your work and we'll move on.
Organizing Objects
Now we're going to talk a little about organization. To start, select Window->World Editor Creator and expand MissionGroup. At the bottom of the list you can see those logos and your building. You can probably imagine that in a full size game, a list like this would get pretty unmanageable. Torque allows you to organize your objects into 'SimGroups', which are essentially folders.
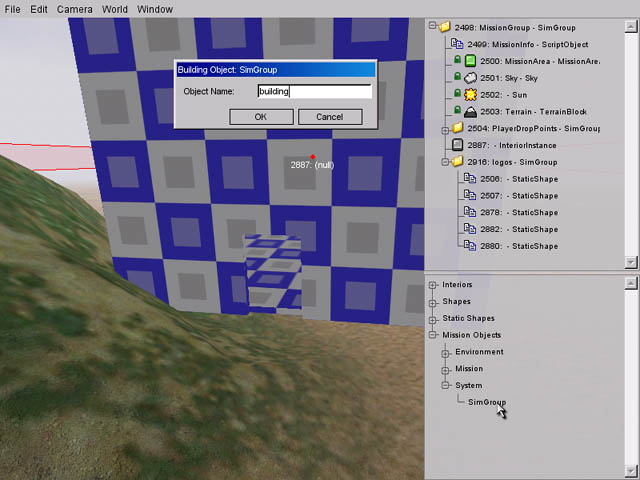
To create a SimGroup, expand Mission Objects and System in the Creator Window. Inside, you'll see SimGroup. Go ahead and click on it. A dialog comes up asking for a name for your new SimGroup. Call it 'logos' and click OK. Now, in the Tree view, drag each of your logo objects into that Logos SimGroup. This logos group is critical to the functioning of GameOne, as we'll see later in the Scripting section. As organization goes, it's a good practice to name your objects as well, so go ahead and name them as well... something descriptive is always best. When you're done with the objects, name that building and create a 'building' SimGroup for it.
Graphical User Interface (GUI)
A game's GUI is an important part of the players' experience. A GUI consists of both the out of game menu system and the in game readouts of score, health, or whatever your game needs to keep track of. The Torque Game Engine provides a powerful GUI editor with many prebuilt controls and the ability to create interface with new controls you create using script and code. Right now, GameOne is starting to be a real game, but it still opens up to the Torque start screen and once you're playing there's no score tracking. As a brief introduction to the GUI Editor, we're going to create those things now.
 Begin by returning to the TGE main menu page, either by restarting torqueDemo, or by selecting File>Quit. From the start page, select GUI Editor. The editor starts out with the current GUI loaded, which in this case is the TGE start page. The right side of the screen should look familiar to you... it's very much like the World Editor Inspector, with a Tree view in the upper window and properties for selected GUI objects in the lower window. Go ahead and look at some of the objects in the Tree and their properties in the Inspector Dialog.
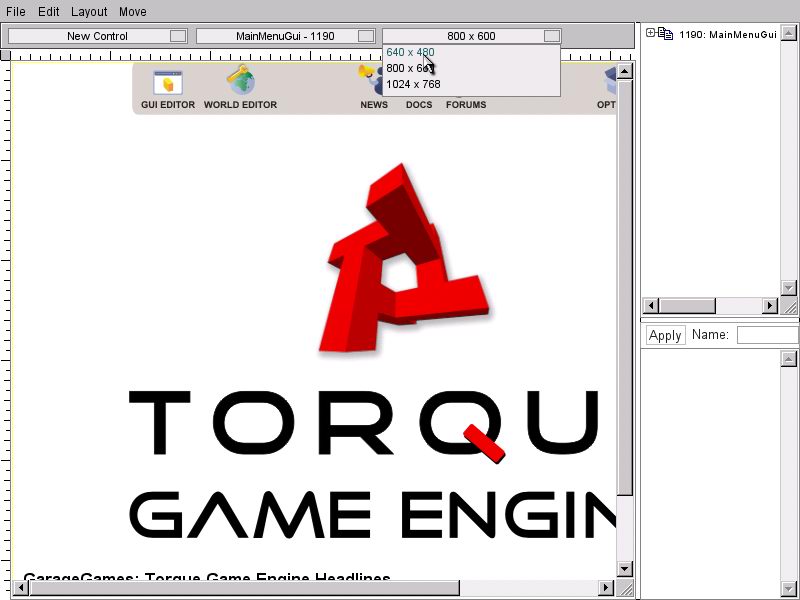
There are three drop down buttons below the menu. They are, from left to right: New Control selection, GUI file selection, and screen size selection. If you click on the middle one (GUI file selection), you'll see a list of GUIs available to edit... you're already in MainMenuGui, which is the one that comes up when you first run torqueDemo. Now select 640 x 480 in the right drop down (screen size selection). This sizing dropdown is useful for checking out how your GUI looks in different resolutions.
Lets start our new GUI by changing the background image. Select the MainMenuGui in the Tree view. Scroll down in the Inspector until you see the bitmap field in the Misc section. We want to be able to see the whole filename, so drag the divider between the left editor window and the right windows until you can see the whole bitmap filename. Now change the filename from 'background' to 'gameonebg' and hit Apply.

If you want, you can remove the Editor buttons from the top of the GUI by selecting and deleting them. If you do, you can still use F10 and F11 to enter the GUI Editor and World Editor from the start page. If you have any problems and you want to revert the MainMenuGui to its original state, just copy the tutorial.base/client/ui/MainMenuGui.gui over the gameone/client/ui/MainMenuGui.gui.
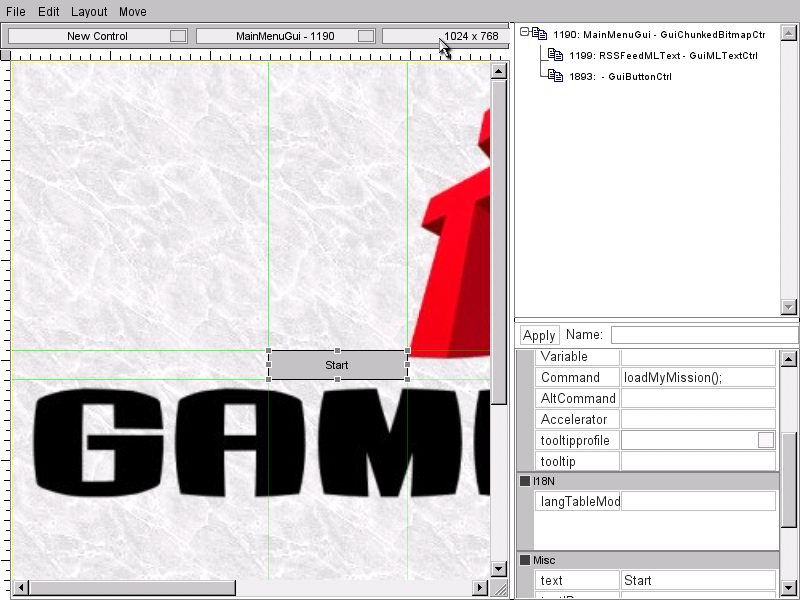
Next we're going to add a button that starts our game. From the New Control dropdown button, select GuiButtonCtrl. You'll see our new button appear in the upper left corner of the GUI. Drag it to somewhere more pleasing, like maybe just below the GameOne title. Next, find the text field in the Misc section of the Inspector. In the blank field type 'Start' and hit Apply. Now it says 'Start', but how will this actually make it start? Find the command field in the Parent section, type in “loadMyMission();†and hit Apply. That's the script function that will run when this button is pressed... and we'll talk about scripts in the next section of the tutorial. Just be sure to type the command (including the semicolon) exactly as it appears in the quotes.
Our start page is pretty much done, but before we go on, let's make sure that it looks right in different sizes. Change the screen size dropdown from 640 x 480 to 1024 x 768. Now scroll down and check out your new button. Oops. When we resize the screen, the button's position changes in a weird way. To fix this, first go back to 640 x 480 mode so that the button's position is restored. Now go into the Button's inspector and change horizSizing and vertSizing to relative and hit Apply. Now do the screen size check again. Much better. Select File>Save GUI..., change the folder to GameOne/client/ui and click the Save button. Toggle the GUI Editor by hitting F10 and exit Torque. Now restart by running torqueDemo... you should come up with the new start page. Pressing the Start button now brings you into GameOne.
Menus are one aspect of GUIs. Another main aspect is the actual interface used while playing a game. One example, which we're about to set up, is the area where the player's score is displayed. In your game, you can always press F10 to enter the GUI Editor or F11 to enter the World Editor. For now, enter the GUI Editor by pressing F10. You'll see that PlayGui, the default GUI when inside a game, is already selected in the middle GUI file button.
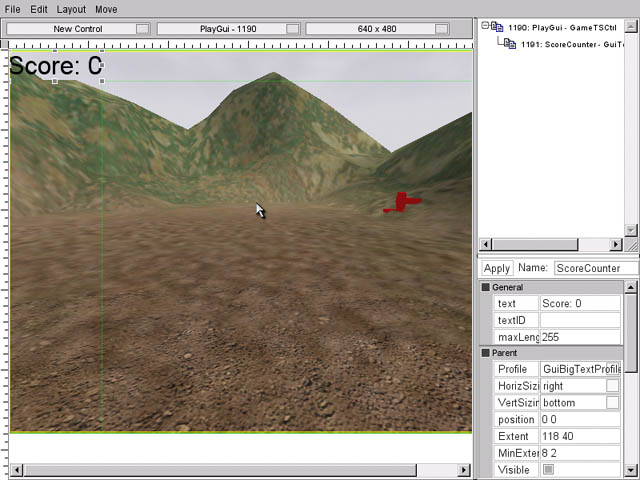
Now we're going to add our score counter. Select GuiTextCtrl from the New Control button. Make sure your new control is selected in the Tree, and we're ready to make some changes in the Inspector window. First, let's name our control 'ScoreCounter' (in the text box next to the Apply button). Now click on the profile button in the Parent section and select GuiBigTextProfile. This is just a standard format used for big letters. Now go to the General section and enter 'Score: 0' in the text field, and hit Apply. You should see your score counter in nice, fat letters. Go ahead and place it wherever you want and test the other screen sizes. If you need to, change HorizSizing and VertSizing to relative. When you're satisfied, select File>Save GUI... and save the GUI as 'GameOne/client/ui/playGui.gui.' Now we have our GUI look, but before it works, we need to do a little scripting...
Scripting
Time to get into a little bit of code... the details of Torquescript and the art of programming in general are beyond the scope of this tutorial, so we'll just be taking a quick walkthrough of some scripts and write a few simple things. If you don't have much programming experience, this section may be a little confusing, but follow along and by the end you'll have a general idea what's going on. Remember we're just getting an idea of how TorqueScript is set up.
When we first got started, we looked at the main.cs that's in the example folder. Right now we're gonna go one layer deeper and look at the main.cs in our GameOne folder. Go ahead and open it up with a text editor, scroll down to the bottom, and you'll find a section with the words 'LOAD MY MISSION'. Under that is the function definition for loadMyMission, which is what we put in the command field of our Start button in the main menu. What's happening here is that this bit of script will run whenever that button is pressed. We won't go into the meaning of the individual lines here, but basically what this function does is set up a simulated server and start a new game. Note: this function was pre-written for this tutorial.
Why do we need a simulated server when our game is single player and running on one machine? Networking is so integral to the architecture of the Torque engine that a network setup is simulated even when a game is played on a single computer. So, when you run GameOne, and even when you are building it, your computer is simulating both a server and a client. If you're confused about servers and clients, you can think of them in this way: the server is the location where our game world data is centralized and the clients are the individual machines that are playing inside that gameworld. A complete description of game networking is too much to go into here, but lots of info can be found in the Torque documentation and resources. Later for that... let's check out some more scripting.
Open up the file GameOne/server/logoitem.cs in your text editor. Inside you'll see the datablock definition for TorqueLogoItem. Datablocks contain generalized information about types of objects in your game. This is useful in networking because it allows all the unchanging information about your objects to be sent across the network only once, during mission load. The TorqueLogoItem has a very simple datablock, containing only a couple pieces of data. The category tells the Mission Editor Creator what type of object it is (remember TorqueLogo was located in Shapes>Items). The shapeFile tells the engine where to find the data file for the actual 3D shape. The category and shapeFile is the same for ALL TorqueLogoItems, which is why it is contained in a datablock. Any objects that do not have datablocks associated with them appear in the Mission Editor Creator as Static Shapes not Shapes. In case you were wondering, the file GameOne/server/game.cs contains a list of datablock files to load.
We're going to add a little bit of functionality to our TorqueLogoItem now. Our goal is to make the TorqueLogoItems act properly when the player touches them. Enter the following text at the bottom of the GameOne/server/logoitem.cs file, save it, and then we'll go over what it does:
function TorqueLogoItem::onCollision(%this, %obj, %col)
{
   if(%col.getClassName() $= "Player")
   {
      %client = %col.client;
      %client.score++;
      commandToClient(%client, 'SetScoreCounter', %client.score);

      %obj.delete();
      %logoCount = logos.getCount();
      if(%logoCount > 0)
        return;
      // otherwise display victory screen
      commandToClient(%client, 'ShowVictory', %client.score);
   }
}
Any object with a datablock can have an onCollision function, which is automatically called when the object collides with another object. The engine provides you with three pieces of data when this happens... %this: the datablock, %obj: the individual object, %col: the object that was collided with. In case you were wondering, the % before a variable name signifies that it is a local variable ($ signifies global). If you don't know what that means, don't worry about it for now. Okay, let's go over the guts of this function:
if(%col.getClassName() $= "Player")
This line makes sure that our logo collided with a player.
%client = %col.client;
%client.score++;
commandToClient(%client, 'SetScoreCounter', %client.score);
This defines %client as the client whose player hit the logo, then increments that client's score and sends a message to the client containing that score. Remember we are simulating both a client and a server even though this is a one player game.
%obj.delete();
%logoCount = logos.getCount();
if(%logoCount > 0)
  return;
// otherwise display victory screen
commandToClient(%client, 'ShowVictory', %client.score);
This removes our logo from the game, then checks our 'logos' simgroup to see how many logos are left in it. If there are no logos left, then we send a message to the client telling it that victory has been achieved.
The onCollision function is ALWAYS called inside the server, and not in the client... which is why we need to keep sending messages to the client whose player hit the logo. It is also why this function is located in the server folder. The next thing we need to do is write the client functions that deal with these messages...
For our client functions, we are going to create a script file from scratch. Open up the folder GameOne/client and create a new text file called 'clientGame.cs'. Enter the following text into your file and save it:
function clientCmdSetScoreCounter(%score)
{
   ScoreCounter.setText("Score:" SPC %score);
}

function clientCmdShowVictory(%score)
{
   MessageBoxYesNo("You Win!",
        "Would you like to restart the game ?",
        "loadMyMission();",
        "quit();");
}
Compare this to these lines from our onCollision function:
commandToClient(%client, 'SetScoreCounter', %client.score);
and
commandToClient(%client, 'ShowVictory', %client.score);
Notice that we create a client function with the same name as the second argument of the commandToClient server function, we just add 'clientCmd' to the beginning of the name. Our client functions themselves are pretty simple... SetScoreCounter sets the text for our PlayGui, and ShowVictory opens up a message box that asks the player if they want to start again.
Okay we are just about done with our scripting. All we have left to do is make sure that our 'clientGame.cs' file gets loaded. Open up GameOne/main.cs and find the 'Client scripts' section of the function called initClient. At the bottom of that list, add the following line, which will load our file:
exec("./client/clientGame.cs");
Conclusion
Congratulations! GameOne is ready to rock. Exit Torque (if necessary) then run it from the beginning and check it out from start to finish. Run around your game world collecting logos. Does it all work? If not, go back through the tutorial and see if you can figure out where you went wrong. Obviously, if you're making your own game, you won't have a tutorial to check against, so this would be the time for playtesting. That means doing everything you can to make something go wrong and then fixing whatever problems you discover, thereby making sure that the player can't break your game.
Note: If you can't move your player's view with your mouse, please see this thread for the fix:
http://www.garagegames.com/mg/forums/result.thread.php?qt=54116
That concludes the Torque 1.4 Introductory Tutorial. You've gotten a good idea of the general features Torque has to offer, but obviously we've only barely skimmed the surface of the specific features available. GarageGames.com has tons of documentation, tutorials, and forums available for further study.
Be sure to look at the other articles on TDN that further explain everything discussed here -- and more.
Have Fun :)
|


